From the start I said I would focus this blog primarily on DSLRs and would only occasionally touch on ILCs and point and shoot cameras. However, similar to last week’s post being tied to my 365 challenge, I also decided to make this week’s post about what I did the following week in my challenge: put down the DSLR and pick up a point and shoot (P/S). In doing so I learned a lot about how to manipulate the settings on the camera, but also a lot about the advantages and disadvantages of this type of camera and some features you may want to look out for if you are in the market for one. So this post will be focused on “small” world of compact P/S cameras.
First off, some may argue that the type of camera I am talking about is probably more appropriately named as a compact digital camera rather than point-and-shoot for two reasons. The first reason is that, if you really think about it, all cameras work by aiming the lens at a subject (point) and actuating the shutter release (shoot), particularly so as most cameras have a full automatic mode regardless of the type. However, I believe the name came about as a way to market the cameras as being simple to use, and that they are based around their automatic functionality, whereas DSLRs, and somewhat ILCs, are based around ability to control the camera and allow the photographer to customize the shot. The second reason is because compact digital camera better describes one of the biggest advantages of the class of cameras, which is their size. DSLRs and ILCs require more space to carry and to store, making them less easy to use quickly particularly when traveling, or just want to bring the camera along just in case a photo op should arise. Compact digital cameras can be carried in a purse or a pocket for quick access and little effort to transport. The term point-and-shoot may have been a better term for this class of cameras if we were talking about the film days as they were not really all that compact due to the film itself and the film advance mechanisms, although they were smaller than the their DSLR counterparts. Now with that being said, it is true today that there are some “compact digital cameras” that are not all that compact as they try to bridge the marketing space between the small pocket cameras and the bulkier DSLR, which is why I will now define what class of camera I am talking about, and for the purposes of this blog, refer to them all as “point-and-shoot,” or P/S for short.
So what is a P/S camera? In general terms, a P/S camera is one that is designed to be used primarily in automatic mode to properly expose the photos. It also contains the camera body, flash and lens all in one, often compact, package. In addition most point-and-shoot cameras rely on the LCD screen to allow the photographer to visualize and frame the subject matter. There may be a better definition out there, but as I am writing this post, this is the description that I have devised for this class of camera.
Now to get beyond the general and to get into the specifics of the camera, I will touch on both functionality (both how it works, and features you may want) and also practical usage of this type of camera. In my past post I have touched on a few of these items very briefly, so I apologize if I am repeating anything here, but I think it is best to capture all of this discussion in this post.
Before I get into specifics on features, let’s take a minute here and discuss good brands for P/S cameras. The major players in the DSLR market are also the major players for P/S. However, while I acknowledged back on my post at the end of April that Nikon and Canon are really a toss-up when it comes to DSLRs, Canon actually takes the edge when it comes to point and shoot cameras. This discrepancy between the two brands is narrowing as the most recent offers from Nikon have caught up a bit, but the usability and the image quality from Canon P/S is still superior to Nikon. That being said, there are also great cameras from Olympus, Sony, Sanyo, Samsung, Kodak, Fuji, Panasonic, etc which all can produce great photos. Actually there are more good options for P/S than there are for DSLR. And as they are all in one packages, you do not need to worry about expandability and compatibility when choosing one. Do your research on the brand and model and you will be happy with the camera you get.
With that out of the way let’s talk more about the features of a P/S camera that you should look out for when selecting a camera. The two biggest are the image sensor and the lens, both of which you don’t have much option on as the camera maker has picked the lens and sensor that work best with the size camera they are making. In general, but always, the larger P/S will have a better lens and a better sensor than the very small compact models. This is all due to space considerations. The smaller cameras need to sue a smaller sensor (which tend to have more noise especially in low light) and also have a shorter zoom range as the larger zoom lens requires more room for the zoom mechanism and actual glass size. You should also test out the quality of the glass, you don’t have much choice, but most camera makers use a decent lens with Nikon and Canon using their own lenses and many others using lenses from excellent 3rd party makers like Carl Zeiss. Now as I said the size of the camera does not always dictate quality. For example many people swear by the camera in the Apple iPhone 4, and I have seen some great photos shot with them that rival the quality of the mid-size compact digitals even though it has a tiny sensor and a tiny lens. But this is the exception rather than the rule. So when picking a point and shoot, if you want better image quality at the sacrifice of size, you should aim for the larger P/S, but if you are after size, you should look at the compact models. It all depends on what you put your emphasis on when looking at cameras.
Adjustability is the next on my list after image quality, but I also prefer a DSLR over a P/S for the same reason. Some point and shoot cameras, primarily the slightly larger ones, give you the ability to tweak settings such as aperture and shutter speed, exposure compensation, in addition to ISO, through the menu system rather than relying on the automatic mode. Now this is not as convenient as a DSLR’s buttons and dials, but at least you still have the option. Many cameras will not give you the option, except maybe for ISO settings, but default to “Auto.” If you want some control over your photos rather than relying on the camera, look for a model that lets you tweak the settings. If this is not important to you, then don’t worry about this. All P/S have automatic as their default operating mode.
If you want some control, but not the fine control of the settings mentioned above, many P/S come with scene modes. These modes tweak what settings the camera picks based on the type of scene you tell the camera you are shooting. Some examples of the scene modes are sports, night time, portrait, macro, etc. and each one adjusts the camera differently. For example a sports mode will likely use a faster shutter speed to stop motion, and turn on a continuous autofocus to be able to maintain focus on moving objects. On flip side, the portrait mode will likely use a larger aperture to soften the background and also will turn on the red-eye reduction if flash is required. Each of these scene modes can be helpful to adjust the camera enough to get a better photo than one with straight automatic mode. You should look to see if the camera has these options and how easy they are access.
Movie mode is being added to many cameras now a day and was in P/S long before they made it to DSLRs. I personally don’t ever use the movie mode, but if you foresee yourself wanting the option then you want to make sure that it has what you want. Many of the newest cameras today will shoot in 720p high definition. It should be noted though that the movies gathered using a compact P/S will likely be of lesser quality than those from a dedicated camcorder.
As the LCD is the main way that you can tell what you are shooting at and what your final photo looks like, you should make sure that it is a good quality. Test out some shot and check out the color reproduction and the size (this is largely dependent on the size of the camera you are looking to buy). Some cameras today are incorporating touch screens to allow you to adjust settings. I typically prefer physical buttons, but some of these touch screens work pretty well.
Another consideration is whether it uses digital or optical zoom. Digital zoom is a gimmick and I have never used it to take a quality photograph. Why is this? All digital zoom does it increase the size of the pixels in the output photograph to make it appear that you got a more zoomed in shot. This is at a great expense of image quality. All of the noise, mistakes, and flaws of your photo are also magnified electronically, and the images are not great. If you really want a closer shot, you should either move closer with you feet, or max out the optical zoom on your camera and crop the photo afterward using photo processing software. You will end up with a much better shot. Optical zoom works just like a zoom lens for a DSLR. It moves around the optical elements in the glass to focus a smaller angle of light onto the sensor. Back in the 1990s when the first regular available compact digital cameras were coming out, most of them would offer very short 2xoptical zoom and then use ridiculous 5x digital zooms and advertize the camera as having 10x zoom capability. While not wrong, the shots taken at 10x zoom were worthless. Now a day you can find much larger optical zooms on P/S cameras with actual optical 3-10x zooms, or on the larger P/S up to 30x or 40x optical zoom. In my mind, focus on the optical zoom range of the lens/camera and any digital zoom feature they advertise is a free extra feature if you want it.
You may also want to consider whether or not the camera will output RAW files. Almost all P/S will output files as a JPEG which is a compressed image file. During compression there can be aritifacts or noise introduced into the image. For most photos this is not a problem, but for some they can ruin the photo particularly if you open it, edit and save it again and again as each time it will recompress the file. RAW files are exactly what they sound like. They are the raw image data that the image sensor collects. With RAW files and the appropriate software (please note this as your standard image viewers cannot open RAW files) you can adjust many of the features of the photograph. And as it has not already compressed the photo it will do so while preserving the image quality. When you are done you can then save it as a JPEG, meaning it is only compressed once. The other advantage is that most RAW files are non-destructive meaning that if you make changes and save the file, you can open it up and get back to the original file but just undoing the changes. If you edit in JPEG and save, the original file is overwritten with the changes. While you may be able to adjust some of the settings back, you will never get back the original shot in the same quality. Now I’ve made a huge case for wanting a camera that outputs in RAW in addition to JPEG. But, practically, you really only need or want a camera with RAW file output if you plan on doing editing, and even then, working with a good editor with JPEGs is fine for the majority of people. In fact many pros will shoot in JPEG as it saves them the steps of processing and converting the RAW file (but it should be noted they also have the skill to get photos just right straight out of the camera). My preference is RAW, but you will be fine with just JPEG output. Also, often times ,the cameras that offer RAW output are higher end P/S and cost more as well.
Lastly is the flash. On compact digital cameras you really do not have a whole lot of options. Every point and shoot will have a built in flash, it will not be fantastic, but will do the job, and it is highly unlikely there will be an option to use an external flash. So, the most important thing to consider here is the ergonomics of the location. The camera designers do a good job of placing the flash where it works and it out of your way, but as everyone holds a camera a little different, you should pick up the camera and hold it as if you were shooting just to make sure your hands, fingers, etc do not block the flash.
Now that I have gone through some of the common features, you may have noticed that the P/S cameras can do a lot that the DSLRs can, but why would you pick one over a DSLR and vice versa. Compared to a DSLR, the biggest advantage of a P/S camera is the size and portability followed by cost. Recently I went out for a walk decided to bring along the point and shoot camera rather than my DSLR. The first think I noticed was how easy it was to bring along. As everything is contained in a single compact package there is no need for accessories or bags. Additionally the ease of sliding it into your pocket and going on your way is a great advantage over a DSLR. With that said, the ability to put in your pocket it obviously based on the size of the camera. If you have a small compact point and shoot, as most people do, then this remain an advantage. However, if you have a larger point and shoot, such as the Nikon P series of cameras, this will not be possible, but a simple case is all that is needed as they are still smaller than your standard DSLR with a lens attached (and typically lighter too). Why is size and portability such an advantage? This may be obvious, but its because your can bring your camera with you wherever you go and never miss a great shot because you decided not to lug around your DSLR. In my mind this is a great reason to have one.
The second reason to opt for a P/S over a DSLR is cost. Because P/S cameras tend to be simpler and don’t have to accommodate different lens options and accessories, and because they often don’t need the same software power that DSLRs require, they tend to be much cheaper. If you are getting into photography or just wanting a camera to take some snap shots, a P/S is definitely the economical way to go. An entry level DSLR kit (includes a lens) from am major manufacturer easily starts between $500 and $600. On the other hand you can get a basic P/S for under $100 and even the top line ones are $300 or $400 dollars.
Now that I have just made a case for wanting a P/S camera over a DSLR, now I am going to highlight some of the disadvantages that should really be considered before deciding which path is right for you. The first plays off the last advantage around cost. Due to the goal to keep costs down for the P/S segment of the market, often the lens, image sensor, and processing power of the camera are inferior to that in a DSLR. While this may not be noticeable to the casual photographer just looking to capture some fun moments with friends, it becomes readily apparent if you have ever compared picture samples side-by-side. And before I continue on, I need to say that the lower quality camera does not mean it is not possible to grab some fantastic high quality photographs using a P/S. This is not the case at all, however there is a difference when you compare the shots you can get with good glass on a good DSLR compared to a good P/S.
The second disadvantage, which is also an obvious one, is that there us a lack of expandability when working with a P/S camera. By their nature, P/S is supposed to be a full camera system in one package. Because of this, there are not options to try out different lenses, add on a better flash (or remotely control an external flash), or even use a filter on the end of the lens (although some P/S cameras do have the option to use a bracket to be able to attach a standard round filter, but this is not common). If you want to upgrade anything, you need to buy a new camera. The catch is that even replacing the camera can be, and often is, much cheaper than upgrading your camera body, or getting a new lens for a DSLR.
The next, which I highlighted early on, is the lack of flexibility to adjust settings, focus points, etc while shooting. Some high end P/S will offer some of these adjustments, such as adjusting your exposure settings, or picking where to focus, but if they do exist, they are often buried in the menu system of the camera which is not very useful if you are trying to adjust on the fly as a great shot reveals itself. Again, while this is a disadvantage, it is one that is intended as these cameras are designed around letting the camera do the technical thinking and letting the person simply compose and decide when to take the shot.
There are also some technical hurdles which are not easily overcome in the world of point and shoot cameras and they all surround the image sensor. The first technical issue comes when trying to shoot in low light. Due to the very small size of the sensor and the desire by both consumers and manufacturers to pack in many megapixels on that small senor, you end up with poor low light shooting. This power performance is due to pixel crowding. Many times the sensor in a point and shoot can be as small as a few millimeters wide and a few millimeters tall. On this smaller area is packed millions of light sensing pixels. Because they are so tightly packed if one pixel is struck by a photon of light it can often cause a response in the surrounding pixels as well but at varying levels. This adjacent excitation results in digital noise and can ruin a picture if it is prevalent, and becomes even more evident in dark areas of a photo (usually a common occurrence in low light shots). This noise during bright day light is often not much of an issue as most of the pixels are being excited and the effect from adjacent pixels is not evident. However, in lower light, in order to get the proper exposure, the camera will open the aperture and lengthen the time the shutter stays open. But because the aperture can only open so wide, and the shutter speed can only be so long before shaking of the users hand cause blur, most cameras well then increase the ISO. Increasing ISO basically takes the signal from the sensor and increases the amplifications. This is fine for most signals, but as P/S already have noise present, the noise is also amplified making the situation even worse. Again, this is a function of the size of the senor, which is a function of the size of the camera. This is also happens to be an issue for DSLRs (see my post on cropped versus full-frame image sensors), but not nearly as much.
The second effect of a small image sensor is an impact of the depth of field. A camera when it focuses, only focuses on a single plane of light at a particular distance from the camera. Depth of field is the area in front of and in back of that plane where the subject matter is in acceptable focus. In the world of DSLRs photographers will use the aperture setting to either allow for a lot of depth of field (for such shots as landscapes) to capture all of the photo in focus, or purposely opening up the aperture to blur the foreground and background (such as for portraiture) to make the subject stand out from the surroundings. Typically on a DSLR if you use a larger aperture (small f-number) you get a shallow depth of field and if you use a small aperture (large f-number) you get a deeper depth of field. If you have ever used a P/S camera and are familiar with this effect of aperture on the depth of field, you will have noticed that even if the camera picks a small f-number, such as f/3, which would normally provide a shallow depth of field, the image actually has a large depth of field. In fact, unless using the close-up/macro mode and being very close to a subject (depth of field is also dependent on the distance between the camera and the subject), you will hardly ever see the blurring effect by using a large aperture (small f-number). Why is this? Wouldn’t the same aperture provide the same effect regardless of the camera? In short, no. Just like a smaller sensor means that the perceived focal length of a lens is longer (again see my post on cropped and full-frame image sensors) it can also have the same effect on the depth of field. For effect on focal length a crop factor must be applied. For example a point and shoot may have a crop factor of 8x or greater. Often the actual focal length of a lens on a small point and shoot would only be 6.25mm, but due to the crop factor, it would provide the same view as a 50mm lens on a full-frame DSLR. This 8x crop factor also works on the aperture and associated depth of field. In order to determine the effective aperture, you must also multiple by the crop factor of the sensor. For example, if shooting a picture of a person 10 feet away, and the camera selects f/3 for an aperture, the effective aperture size in terms of depth of field is f/24 which is very small and provides a long depth of field. It should be noted, that this has no effect on the amount of light let in by the aperture at f/3, but it does on the depth of field. This phenomenon is a product of the small sensor size on what is known as the “circle of confusion” which dictates the depth of field of a sensor and lens (aperture) set up. I will cover this more in the future, but for this post all that is needed to be known is the effect on images from a P/S camera. So why then is this a disadvantage? It is a disadvantage as you lose the creative control over adjusting this depth of field based on your subject matter. The camera will still produce a fine image, but everything will be in focus. Again, there are exceptions when shooting in “macro mode” but the effect on depth of field is small (only slight blurring at larger apertures).
Just like there are advantages and disadvantages that should be considered around P/S cameras, there are also a couple of technique considerations as well. P/S cameras are designed to use the LCD to compose and frame the shot. However, in order to do this, you must hold the camera away from your body to allow you to see the screen. When using a DSLR, or a camera with a viewfinder, you should hold the camera up to your eye to see the image, and tuck in your elbows which makes for a more stable shooting position (or part of it). Since this is not possible when using a P/S, care should be taken particularly in low light, to hold the camera steady. In very low light, or macro situations, a tripod should be used similar to when a tripod should be used for a DSLR. This not only gives a stable platform for the shot, but also potentially restrict the camera to lower ISO setting (if an option on your camera) forcing the camera to use a longer exposure. This will result in lower noise (but beware of the subject as a moving subject will blue with longer exposures). All point and shoot cameras have a threaded slot in the bottom to allow it to be attached to a tripod. The good thing is that more portable (lighter) tripods can be used as they do not need to hold up a lot of weight. Without trying to sell any one product I do have to highlight the Joby Gorillapod as a great option for a portable, flexible tripod with options for point and shoots and even for DSLRs.
The next consideration has to do with the macro mode. Although not true macro functionality (see last week’s post), the macro mode will allow the photographer to get closer to the subject. It does this by restricting the zoom range of the lens and also changes the focus mechanism to get close to the subject using the same built in lens (a benefit of a small sensor). The change is focusing also puts the camera into a continuous focusing mode which will constantly hunt to maintain focus. Because of this second point, the big consideration here is battery life. This mode will definitely wear down your battery faster so care should be taken to turn it on and off when needed.
Everything else about shooting with a point and shoot is the same as shooting with any camera. It is all about light and composition.
Now that I have run through features, advantages, disadvantages and technique, what would I buy? A DSLR or a point and shoot? Well, as you already know, I do own a few DSLRs. And up until this point, I do not own a P/S camera of my own (I borrow my fiancé’s if I want to use one). You may then think the answer if obvious, but it is really not. I actually do want a point and shoot camera, but only to complement my DSLRs. It all depends on what, where and when you are shooting. If I want to ensure my pictures are of high quality, need the flexibility of the DSLR, and can bring it along easily, I will reach for my DSLR every time. However, there are times where wanting to bring a camera, but not wanting to lug around a DSLR, when a point and shoot is the perfect option. At some point I do plan on buying a point and shoot to have as a pocket camera to either bring by itself or in addition to my DSLR when I head out to shoot. And when I do, I will consider all I have presented above and more to make sure I pick the right one for me and my wants and needs. The bottom line is that DSLRs and P/S are different tools that perform the same function. Depending on what you want to shoot, your budget and your personal preferences, both types of cameras will do the job. Whatever you have in your camera gear, get out and capture the world.
Monday, June 6, 2011

Monday, May 30, 2011
It’s All in the Details – Seeing the World through Macro Photography
Two weeks ago, I spent my time get up close and personal with many subjects around me with my macro lens. I love macro photography. If I could only shoot one type of photograph, and thankfully I don’t have to, I would pick macro. There’s something about getting close enough to a subjects to capture a view of the small details that we take for granted every day. Whether it be the fine details in a leaf or a flower, or perhaps the intricate colors and patterns of the human iris, the world up close is always amazing to me. So now that I have briefly espoused the wonders of macro photographs, what equipment do you need and how do you take them?
First off, you can take macro shots with most P/S cameras as well as with DSLRs and ILCs. The difference being that with point and shoot cameras, you are stuck with a single lens to cover a wide range of uses. As such, macro photographs taken with a point and shoot may not actually be truly macro, and often come out less sharp than desired. But this certainly does not mean that you can’t grab great macro shoots with a P/S, but it does mean you need to test out you camera to see how well it performs. For DSLRs and ILCs, the magic of macro is all in the lens. Any camera body will be able to take a macro shot. For this reason, I am focusing the majority of this post on macro lenses, but I will revisit P/S macro later on, so keep reading if you are in that camp.
What is a macro lens? In general, a macro lens is one that can focus on a subject that is closer to the front element of the lens than would normally be possible on a standard lens. That’s really about it. Post over….
…ok, not really, because there is really more to it. More specifically, it is commonly agreed that a macro lens is a lens with a reproduction ration of 1:1 or greater. This means that 15 mm of space on a subject takes up equivalent amount of space on the sensor. This means that if you have a sensor that is 36mm wide (for a full frame sensor), a 1:1 macro lens is one that can focus on the metric ruler with 0mm hitting one edge of the frame and 36mm hitting the opposite edge. A 2:1 macro lens would be one where the lens could focus closely enough that the 0mm mark would be on one side and the 18mm mark would be on the other. That’s pretty close up. To give some perspective to what 1:1 means, if you took a photo of your thumb (width-wise) with a 1:1 macro, you could get close enough to have it fill the over half of the image while still being able to focus on it. As an example, my Nikkor 50mm f/1.8 has a minimum focusing distance of about 1.5ft. That means if the end of my lens gets any closer than 1.5 feet to the subject I am trying to focus on, I will not be able to obtain focus. 1.5 ft is pretty good too. On the flip side, a 50mm macro lens would be able to obtain focus at about 6-7 inches, bit in many cases, even though the listed focus distance is 7 inches it will focus much closer. As an example, I have used my 60mm AF-S Micro-Nikkor and been able to achieve focus as close as 2 inches away (Note: When shooting this close, be sure to check your light as being this close can cause the lens to actually block out a lot of light). Using a longer macro lens with 1:1 capabilities just means you can get the same reproduction, but you can be physically further away from your subject. This is why Nikon makes a 1:1 105mm Micro-Nikkor and a 1:1 200mm Micro-Nikkor. Neither of these lenses can reproduce the same size image as the 1:1 60mm Micro-Nikkor, but from a greater distance. As an example, this is particularly handy when shooting bees pollinating flowers without disturbing the bee or the flower. However, when working with products or handheld, I really like a 50 or 60mm lens as I can look for the details with my eyes, in addition to through the camera, by just lowering the camera.
Most macro lenses are 1:1, although some that are 1:2 often are marketed as macro although they technically are not true macro lenses. You can also find 2:1 macros. Canon also makes a fantastic macro lens (Canon MP-E 65mm f/2.8) that is capable of 5:1 reproduction. Honestly, I have thought about getting a used digital Canon body (yes, a Nikon guy giving props to Canon does happen), just so I can use this lens, but I have not pulled the trigger (primarily because the lens itself is about $1000 when bought new). It should also be noted, that lenses that are 1:1 and designed for full frame which actually get a boost in magnifying performance when used on a cropped sensor, similar to how they get a boost when using telephoto lenses.
Most macro lenses include many features such as special lens coatings to reduce reflections and to help with super sharp images. The best macro lenses also using an internal focusing mechanism. This means that when the focus ring is turned, the only movement occurs within the lens body. This helps as when you are close to a subject as it often can cause issues if parts of the lens are turning (especially when using certain types of filters) as well as the lens getting physically longer and shorter. I have used macro lenses of both designs and the internal focusing lens are much easier to use and often have better focus.
Another way to get a very good macro lens, and often times one that is greater than 1:1, is to reverse mount a fast prime lens directly to the camera. Many companies make adapters to do this and they are fairly cheap. The best lenses for this type are normal and wide angle. How does this work? Well it works because a lens is designed to gather light and focus it down into a small circle that hits the image sensor. If the lens is inverted the lens works in the opposite fashion; expanding the image before it hits the sensor. For this reason, wider angle lenses provide more magnification than do normal lenses. The problems with this setup are that it leaves the rear element of the lens exposed to the element. Some companies, Nikon being one, makes an adapter than can be attached to the bayonet end of the lens and allows you to attach a 52mm filter for some added protection. In this setup the focus works similarly, but often it works best to focus to infinity and just move closer and further away in order to obtain proper focus. Also it is best to use the lens wide open (largest aperture), which often means that the depth of field is very shallow. To combat this, a technique known as focus stacking can be used to get an image with a larger depth of field. I’ll touch on this in a future post.
This same reversed technique can be taken a step further. A reversed lens can be mounted on the front of another lens (often referred to as a “supermacro” lens). This is often best done using a fast wide angle to normal lens reversed and mounted to a telephoto lens that is attached to the camera. The reversed lens works as it does just when attached to the camera, however with the telephoto lens increases the magnification even more. Coupling adapters are available from a bunch of sources for a few dollars apiece. Ideally it is best to use lenses with the same filter diameter, but if they are close (52mm diameter mounted on 62mm diameter lens) it will work fine with minimal vignetting. This technique has an incredibly shallow depth of field so it is best to use the same focusing techniques mentioned above. The overall effect can yield 4:1 and 5:1 magnifications with lenses you may already have in your camera bag. The general rule is to divide the focal length of the telephoto lens by the focal length of the reversed lens. For example, if a 28mm lens is reversed on a 105mm lens, the approximate magnification power is 3.75:1. This can be even more if the telephoto is a 1:1 macro lens. With these set ups, unless you have a ton of light, you should definitely use a tripod.
As mentioned point and shoot cameras often have a “macro” mode, but it really should be called a close-up mode. These cameras while still able to produce great images, cannot reproduce at a ratio of 1:1 like a dedicated macro lens. Again, this is because the lens and systems are designed to cover a really large range, and being able to reproduce at 1:1 is why there is so much engineering that goes into dedicated lenses. Again, with that being said, even though it may not be 1:1, P/S cameras are still capable of taking some great close up shots.
Now that you know about the lenses and different setups, it’s time to touch on some techniques and considerations when shooting macro photographs. The first thing, and I have already mentioned it above, if shooting macro, the way to get super sharp photos is to use a tripod. Because the magnification is so close and the area you are focusing on it small, any slight movements can cause soft focus, or blur. When using very close magnification, even the slight vibration from pressing the shutter release can cause shake, so using a remote shutter release can help eliminate this shake. Essentially you use a lot of the same techniques used when using a long telephoto lens to eliminate shake.
The process of focusing when using a macro lens, and when taking macro photographs with a non-macro lens, can be a little trickier due to the small subjects and fine details. As such, it is recommended to forgo the autofocus and grab hold of the focus ring to really dial in focus on the details you are after. As lens manufacturers know that you would need to really dial in the focus, the focus ring on a macro lens has a much finer control than on standard lenses. This means that is takes more turns of the ring to sweep from near focus to infinity. While this is great for macro shooting, it is something to take into consideration when using the lens to go between near and far objects. The macro mode on a point of shoot camera often changes the way the camera focuses. Typically it goes into a mode where it constantly tries to maintain focus even prior to touching the shutter release. It will also typically limit the zoom range of the lens in while macro shooting is available. This mode and type of focus is great for obtaining focus for macro shots, but it can drain the battery fairly quickly so be sure to turn it off when you are not using it.
Another factor to take into account, more so than when shooting subjects further away, is the amount of light needed and where the light sources are. As the process of shooting close up and often mean placing your lens is closer proximity to the subject, this can mean that the lens or the photographer can potentially get in the way of the light source. For example, an on camera flash is often useless for macro as the light is blocked by the lens itself. There are macro flash setups, such as ring flashes, that put the light source out near the end of the lens or allow the light to be angled directly in line with front of the lens. If you are out using the sun, be wary of the direction of the sun, so your body does not shade the subject. Lastly, the small shadows on a magnified shot are also magnified. This is why it is essential to make sure you have plenty of light. You are better off with more light than you need as you can always stop down or increase your shutter speed.
In addition to movements of the camera as discussed above, movement of the subject can also wreak havoc when shooting macro photographs. From a slight breeze moving a flower, or an insect that won’t stand still, you must be aware of what you are shooting and if it will stay still long enough to get a good shot. I personally do not do a lot of insect macros, but I have read and heard that many photographers who focus on these small living subjects, will often use cold temperatures (catching and refrigerating the insect, or using an cold bowl) to slow down the insects long enough to catch multiple shots very close up. While this is just one trick for shooting insects, the most important is being aware of the circumstances of the shot to make sure movement can be minimized.
I kept this post shorter than past weeks, but covered many aspects of shooting in macro. As I said at the beginning, I love shooting macros, and I think everyone should give it a try. If you don’t want to invest in a true 1:1 macro lens, try reversing a fast prime lens, or at least try working around the minimum focusing distance of your favorite normal lens. Any way you try it out, you will see there is a whole new world found in the small details all around us. Go out and capture it.
First off, you can take macro shots with most P/S cameras as well as with DSLRs and ILCs. The difference being that with point and shoot cameras, you are stuck with a single lens to cover a wide range of uses. As such, macro photographs taken with a point and shoot may not actually be truly macro, and often come out less sharp than desired. But this certainly does not mean that you can’t grab great macro shoots with a P/S, but it does mean you need to test out you camera to see how well it performs. For DSLRs and ILCs, the magic of macro is all in the lens. Any camera body will be able to take a macro shot. For this reason, I am focusing the majority of this post on macro lenses, but I will revisit P/S macro later on, so keep reading if you are in that camp.
What is a macro lens? In general, a macro lens is one that can focus on a subject that is closer to the front element of the lens than would normally be possible on a standard lens. That’s really about it. Post over….
…ok, not really, because there is really more to it. More specifically, it is commonly agreed that a macro lens is a lens with a reproduction ration of 1:1 or greater. This means that 15 mm of space on a subject takes up equivalent amount of space on the sensor. This means that if you have a sensor that is 36mm wide (for a full frame sensor), a 1:1 macro lens is one that can focus on the metric ruler with 0mm hitting one edge of the frame and 36mm hitting the opposite edge. A 2:1 macro lens would be one where the lens could focus closely enough that the 0mm mark would be on one side and the 18mm mark would be on the other. That’s pretty close up. To give some perspective to what 1:1 means, if you took a photo of your thumb (width-wise) with a 1:1 macro, you could get close enough to have it fill the over half of the image while still being able to focus on it. As an example, my Nikkor 50mm f/1.8 has a minimum focusing distance of about 1.5ft. That means if the end of my lens gets any closer than 1.5 feet to the subject I am trying to focus on, I will not be able to obtain focus. 1.5 ft is pretty good too. On the flip side, a 50mm macro lens would be able to obtain focus at about 6-7 inches, bit in many cases, even though the listed focus distance is 7 inches it will focus much closer. As an example, I have used my 60mm AF-S Micro-Nikkor and been able to achieve focus as close as 2 inches away (Note: When shooting this close, be sure to check your light as being this close can cause the lens to actually block out a lot of light). Using a longer macro lens with 1:1 capabilities just means you can get the same reproduction, but you can be physically further away from your subject. This is why Nikon makes a 1:1 105mm Micro-Nikkor and a 1:1 200mm Micro-Nikkor. Neither of these lenses can reproduce the same size image as the 1:1 60mm Micro-Nikkor, but from a greater distance. As an example, this is particularly handy when shooting bees pollinating flowers without disturbing the bee or the flower. However, when working with products or handheld, I really like a 50 or 60mm lens as I can look for the details with my eyes, in addition to through the camera, by just lowering the camera.
Most macro lenses are 1:1, although some that are 1:2 often are marketed as macro although they technically are not true macro lenses. You can also find 2:1 macros. Canon also makes a fantastic macro lens (Canon MP-E 65mm f/2.8) that is capable of 5:1 reproduction. Honestly, I have thought about getting a used digital Canon body (yes, a Nikon guy giving props to Canon does happen), just so I can use this lens, but I have not pulled the trigger (primarily because the lens itself is about $1000 when bought new). It should also be noted, that lenses that are 1:1 and designed for full frame which actually get a boost in magnifying performance when used on a cropped sensor, similar to how they get a boost when using telephoto lenses.
Most macro lenses include many features such as special lens coatings to reduce reflections and to help with super sharp images. The best macro lenses also using an internal focusing mechanism. This means that when the focus ring is turned, the only movement occurs within the lens body. This helps as when you are close to a subject as it often can cause issues if parts of the lens are turning (especially when using certain types of filters) as well as the lens getting physically longer and shorter. I have used macro lenses of both designs and the internal focusing lens are much easier to use and often have better focus.
Another way to get a very good macro lens, and often times one that is greater than 1:1, is to reverse mount a fast prime lens directly to the camera. Many companies make adapters to do this and they are fairly cheap. The best lenses for this type are normal and wide angle. How does this work? Well it works because a lens is designed to gather light and focus it down into a small circle that hits the image sensor. If the lens is inverted the lens works in the opposite fashion; expanding the image before it hits the sensor. For this reason, wider angle lenses provide more magnification than do normal lenses. The problems with this setup are that it leaves the rear element of the lens exposed to the element. Some companies, Nikon being one, makes an adapter than can be attached to the bayonet end of the lens and allows you to attach a 52mm filter for some added protection. In this setup the focus works similarly, but often it works best to focus to infinity and just move closer and further away in order to obtain proper focus. Also it is best to use the lens wide open (largest aperture), which often means that the depth of field is very shallow. To combat this, a technique known as focus stacking can be used to get an image with a larger depth of field. I’ll touch on this in a future post.
This same reversed technique can be taken a step further. A reversed lens can be mounted on the front of another lens (often referred to as a “supermacro” lens). This is often best done using a fast wide angle to normal lens reversed and mounted to a telephoto lens that is attached to the camera. The reversed lens works as it does just when attached to the camera, however with the telephoto lens increases the magnification even more. Coupling adapters are available from a bunch of sources for a few dollars apiece. Ideally it is best to use lenses with the same filter diameter, but if they are close (52mm diameter mounted on 62mm diameter lens) it will work fine with minimal vignetting. This technique has an incredibly shallow depth of field so it is best to use the same focusing techniques mentioned above. The overall effect can yield 4:1 and 5:1 magnifications with lenses you may already have in your camera bag. The general rule is to divide the focal length of the telephoto lens by the focal length of the reversed lens. For example, if a 28mm lens is reversed on a 105mm lens, the approximate magnification power is 3.75:1. This can be even more if the telephoto is a 1:1 macro lens. With these set ups, unless you have a ton of light, you should definitely use a tripod.
As mentioned point and shoot cameras often have a “macro” mode, but it really should be called a close-up mode. These cameras while still able to produce great images, cannot reproduce at a ratio of 1:1 like a dedicated macro lens. Again, this is because the lens and systems are designed to cover a really large range, and being able to reproduce at 1:1 is why there is so much engineering that goes into dedicated lenses. Again, with that being said, even though it may not be 1:1, P/S cameras are still capable of taking some great close up shots.
Now that you know about the lenses and different setups, it’s time to touch on some techniques and considerations when shooting macro photographs. The first thing, and I have already mentioned it above, if shooting macro, the way to get super sharp photos is to use a tripod. Because the magnification is so close and the area you are focusing on it small, any slight movements can cause soft focus, or blur. When using very close magnification, even the slight vibration from pressing the shutter release can cause shake, so using a remote shutter release can help eliminate this shake. Essentially you use a lot of the same techniques used when using a long telephoto lens to eliminate shake.
The process of focusing when using a macro lens, and when taking macro photographs with a non-macro lens, can be a little trickier due to the small subjects and fine details. As such, it is recommended to forgo the autofocus and grab hold of the focus ring to really dial in focus on the details you are after. As lens manufacturers know that you would need to really dial in the focus, the focus ring on a macro lens has a much finer control than on standard lenses. This means that is takes more turns of the ring to sweep from near focus to infinity. While this is great for macro shooting, it is something to take into consideration when using the lens to go between near and far objects. The macro mode on a point of shoot camera often changes the way the camera focuses. Typically it goes into a mode where it constantly tries to maintain focus even prior to touching the shutter release. It will also typically limit the zoom range of the lens in while macro shooting is available. This mode and type of focus is great for obtaining focus for macro shots, but it can drain the battery fairly quickly so be sure to turn it off when you are not using it.
Another factor to take into account, more so than when shooting subjects further away, is the amount of light needed and where the light sources are. As the process of shooting close up and often mean placing your lens is closer proximity to the subject, this can mean that the lens or the photographer can potentially get in the way of the light source. For example, an on camera flash is often useless for macro as the light is blocked by the lens itself. There are macro flash setups, such as ring flashes, that put the light source out near the end of the lens or allow the light to be angled directly in line with front of the lens. If you are out using the sun, be wary of the direction of the sun, so your body does not shade the subject. Lastly, the small shadows on a magnified shot are also magnified. This is why it is essential to make sure you have plenty of light. You are better off with more light than you need as you can always stop down or increase your shutter speed.
In addition to movements of the camera as discussed above, movement of the subject can also wreak havoc when shooting macro photographs. From a slight breeze moving a flower, or an insect that won’t stand still, you must be aware of what you are shooting and if it will stay still long enough to get a good shot. I personally do not do a lot of insect macros, but I have read and heard that many photographers who focus on these small living subjects, will often use cold temperatures (catching and refrigerating the insect, or using an cold bowl) to slow down the insects long enough to catch multiple shots very close up. While this is just one trick for shooting insects, the most important is being aware of the circumstances of the shot to make sure movement can be minimized.
I kept this post shorter than past weeks, but covered many aspects of shooting in macro. As I said at the beginning, I love shooting macros, and I think everyone should give it a try. If you don’t want to invest in a true 1:1 macro lens, try reversing a fast prime lens, or at least try working around the minimum focusing distance of your favorite normal lens. Any way you try it out, you will see there is a whole new world found in the small details all around us. Go out and capture it.
Monday, May 23, 2011
Seeing Red - All About IR Photography, Filters and Conversions
After spending last week shooting with my IR converted D90 for my 365 challenge, I decided that this week’s post would be a nice complement. Shooting in IR can be done with special film or with most digital cameras, whether SLR, ILC or point and shoot. For the most part I’ll be talking about IR photography using a DSLR, but the theory and general technique is the same. I also talk a little bit about UV light photography as the concept of how it is done is similar, but not the same, to IR photography.
What is infrared (IR) light? While the exact cutoffs vary based on the source, most agree that visible light has a wavelength ranging from just below 400nm (violet) to right around 800nm (red). Light below the visible range (shorter wavelengths) is ultra-violet, or UV for short, and light just above the visible range (wavelengths longer than 800nm) is known as infrared. I purposely kept this short and as I could easily give a science lesson on this, but for the purposes of this post, this is all you need to know.
The human eye can only detect light in the visible light range and cannot see ultra-violet or infrared light. However, the CCD and CMOS sensors of digital cameras can. The range of most CCD and CMOS sensors is from around 200-250nm up to about 1100-1200nm. It should be noted, that many people, when they hear the term “infrared photography,” immediately think of thermal imagery. While this is also technically a form of infrared photography, as it is measuring heat which is infrared radiation, the wavelengths in thermal imaging are in the far infrared around 14,000 nm. These are much longer wavelengths than the sensitivity of the CCD and CMOS sensors can handle, so special cameras (also pronounced "very expensive") are used for this type of imaging which then convert the signal to a color spectrum that humans can interpret. Again this is not what I am talking about in this post. I am talking about your regular everyday DSLR or P/S camera being able to see and photograph the near infrared light in the range of 800-1100nm. With that clarification aside, let me continue.
So, you have a DSLR or a point and shoot camera, you should be ready to go to shoot some IR shots, right? Not quite. Most camera makers insert a filter directly in front of the image sensor, known as a cut filter, which works to block any IR and UV light front hitting the sensor. Why would they limit the capability of the camera this way? Well in short, the lenses and camera systems were designed to focus and capture visible light and not IR or UV. As such UV and IR light focus differently than visible light (something I’ll touch on a little later) and in some shooting situations can be more intense than the visible light. The resulting effect is a potential for a lot of noise, a photo that looks a bit out of focus, a photo that can be over or underexposed, and in general just a bad photograph. As camera makers are primarily focused on what the majority of photographers want to shoot, visible light, it benefits the camera maker and the photographer to have this cut sensor in place. How do you take photos in infrared if the camera is designed to block the infrared light from hitting the sensor? The cut sensor doesn’t block all IR, but only enough to prevent it from hitting the sensor during the use of normal shutter speeds. In addition to that, the filter in some cameras is better than that in others, with newer cameras having better filers than those in older cameras. Through a couple of techniques these facts still a photographer to take IR shots even with the cut sensor in place.
By leaving the cut sensor in place in the camera, it means that you can still use your camera to take regular visible light photos. However, it also means you must use a filter on the end of the lens to block out the visible light. How come? In this situation you need to consider that the light you are trying to capture, infrared, is making it to the sensor with significantly less intensity than visible light due to the cut filter. By still allowing the visible light through, it very quickly overwhelms the small amount of infrared light able to get through with the actuation of the shutter. By attaching an infrared pass filter to the front of the lens, it blocks the visible light and allows the infrared light through to hit the sensor. Some of you may have already picked up on them, but there are two very big considerations to take into account when taking infrared photos this way. First off, because the cut filter is still in place, the camera is working against the light, meaning you need significantly longer exposure times to give enough IR light a chance to make it to the sensor. Depending on your camera and its cut filter, this could range from a little less than a full second (like on my D40) up to or exceeding a full minute long exposure (my non-converted D90). The difference in the exposure time is due to the quality and strength of the cut filter. The only way to know how long you need to expose is to experiment with your specific camera. The second big consideration, and this applies to the DSLRs, is that due to the design of the camera the viewfinder works by using a mirror to look through the actual lens to focus and frame your shots. With a filter on the front that blocks visible light, the only light making it to the viewfinder is infrared, which you cannot see. It should be noted that most digital P/S, and cameras with electronic viewfinders (EVF) will produce can image however it will be faint due to the cut filter.
Many photographers who are experimenting with IR photography use this technique. It just means that you need to focus and frame and then place the filter on the end of the lens. It also means you absolutely must use a tripod for every shot. But, it also means you can still use your camera for normal visible light photography without having to buy a 2nd camera to get converted just for IR work (a hefty expense especially if you are just trying it out). I myself started this way and have a set of infrared filters in my camera bag. As with all of other types of filters there is a range of functions and performance in the world of infrared filters. I will touch on 3 specific types here, but there are some variations. The three types by their commonly used names are the R72, Wratten 87C, and the RM90.
The R72 designation for the first filter comes from Hoya, a very popular and large manufacturer of glass filters. The truth is that each company gives each filter a name based on its own naming scheme, but the numbers I provided above are the most commonly used names to reference each type of filter. The R72, also known as the Wratten 89B, has 50% cutoff at 720nm. This means that at 720 nm, only 50% of the light with wavelength shorter than 720nm is passing through the filter, and the drop off is pretty quick. This filter is the most common deep-red/infrared, also known as “false color” infrared, filter around. By false color, I mean that the filter still allows the wavelengths for the deep red visible range through as well as the infrared. This allows for some subjects to retain a small portion of color that can be played around with in post processing by performing a channel swap. For this reason, this is a very popular type of filter. IR purists believe that false color is not as artful and is more of a gimmick because it gives the photos a certain look that is not completely IR. My view is that anything you can do to make photograph appealing to an observer or the artist themselves cannot be a gimmick. If you don’t prefer false color IR photos, then you can just opt to not look at them or have an opinion that you don’t like them, but it doesn’t remove any of the artfulness behind taking the photographs.
However the purists do have a point as it is not a true IR photograph. For that, you need to use at least a Wratten 87C filter. The Wratten numbering system for filters was developed by Kodak for their square gelatin filters, and many other people still refer to filter types similar to those made by Kodak by the Wratten number (like how the Hoya R72 is equivalent to a Wratten 89B and vice versa due to their similar cutoff, although the Hoya is a round, glass filter and the Kodak is a square gel). The Wratten 87C has a 50% cutoff at 850nm which is out of the visible range. The effect here is that the image produced out of the camera appears black and white. Areas that reflect a lot of infrared light (such as foliage) appear white and subjects that absorb IR light (such as the sky) appear dark or black. There are 3 other types of the Wratten 87x filters. The Wratten 87B has a 50% cutoff around 900nm and the Wratten 87A has a cutoff around 1000nm. Lastly there is also a Wratten 87 (no letter) that has a cutoff around 770nm. Only the 87C and the 87 are still produced by Kodak, and other manufacturers also make equivalent filters. There are also other manufacturers who make filters similar to the 87B and 87A. One of these is the Hoya RM90. The RM90 like the 87B has a cutoff at 900nm. The effect in the IR is that it gives a very deep contrast to the IR shots as only the best reflectors of IR light show up as white or tones of gray. The problem is that you need very bright sunlight to get these photos (and photos taken with the 87A equivalent RM100).
If you want to try out false color, I recommend a R72 or equivalent filter. There are also filters with lower cutoffs at 650 and 600nm which also let in part of the yellow spectrum, but I didn’t get into those here. If you want true IR, I recommend a Wratten 87C or equivalent. Use of the high cutoff filters are really for people who already are used to working IR or have a need for that level of cutoff. A last and additional note on the Wratten filters is because they are gelatin filters made in square sizes. If you want the screw on type of the end of the lens, you either need to find a holder for this type of filter that screws in (or hold it by hand), or purchase a round screw-in type from another manufacturer like Hoya, Tiffen or B+W.
For point and shoot cameras, some cameras do have brackets available to hold a standard screw in filter in front of the built in lens of the camera (very few have filter threads on the lens). You can also make an inexpensive filter by using some dark tape, a small piece of a narrow cardboard tube, and either a gel or polyester filter (Lee filters makes some inexpensive by good quality Wratten 87 equivalent filters). Another option for the filter is to use an exposed and developed piece of 35mm film (easily obtained from the exposed end of a film roll that has been developed…although as film is harder and harder to come by, so will this inexpensive method). This DIY device can then be held over the end of the lens on your P/S camera. Try doing a web search for this as there are few different DIY photo sites out there with instructions.
If, and only if, you have already picked up a relatively inexpensive screw-in, or square gelatin type filter and tried doing some long exposures. And if, and only if, you plan to take a lot more infrared photos, should you consider a camera conversion. If you never plan to shoot visible light again then you could get your main camera converted. However, as this would be the case with only a very small group of photographers, I recommend picking up a second camera to have it converted. I did exactly this and picked up a used D90 off of EBay. Before I get into the actual conversion, what should look for in a camera to get converted? Basically you want the same things you wanted from your main visible light camera, but with one caveat. For most photographers, the live view function on a DSLR (being able to view the image on the back LCD and you frame and shoot) can be a handy feature for visible light photography (although some never use it like me). But for shooting in IR, live view can be an invaluable tool . I’ll touch on this more when talk about shooting in IR, but for now just know that if you are planning on getting a DSLR for your IR work, I highly recommend getting one with the ability to view and shoot with the image live on the LCD (most DSLRs in the last few years have this feature). Also, I recommend getting a used DSLR whether through a reputable camera shop or after doing your research on EBay. Why? If you get a brand new camera, you do get a warranty, but as soon as you get it is converted, the warranty is then void. So if you get a good used camera with a low number of actuations, it is really no different than one that is brand new with a voided warranty and could save you several hundred bucks (I personally saved $500 by going used with my second DSLR rather than getting one new, and would do it again in a heartbeat).
When doing a camera conversion, either you (if you are really bold) or, the more recommended route, by using a company that specializes in infrared conversions, will open up the camera body, take out the infrared cut filter on the sensor, and replace it with a specific infrared pass filter. The type of conversion you want takes into consideration many of the same ideas as when selecting a type of filter to screw into the end of the lens. You can get one with a cutoff at 650, 720, 810, 850, 900nm, etc. However with that being said, one big consideration is that the filter is permanent so if you have a 900nm conversion, you cannot undo it by just popping out the filter and popping in in IR in a 720nm filter to do some false color work. Because of this, if you enjoy doing false color work often and only want to do true IR every once in a while, I recommend getting a 720nm or similar conversion. You can always put a Tiffen 87 or a Hoya RM90 on the front of the IR camera to get deeper IR just like if you had an unmodified camera, but the exposures would not be nearly as long. Also, an image taken with a 720nm camera and then converted to black and white is similar to one taken with a higher cutoff (don’t kill me IR purists! I know you will argue that’s not true, but note that I said similar). If you absolutely love true IR and only want to do that type, or if you only do false color once in a blue moon, then I recommend an 810 or and 850nm conversions. You can always throw a Hoya R72 on your visible light camera for some long exposures for false color. Because 900 nm and up is so rarely used , I hardly ever recommend getting this conversion as it is very restrictive in your options. But, if it is right for you and your work, go for it.
As an aside, you can also do the same type of conversion on the other end of the spectrum for UV only. There are other considerations to take into account when shooting in UV but I’m not going to cover those here except to say that an example of one of these considerations is that optical glass absorbs some UV light so the best lenses uses quartz elements, but these are very rare and expensive (many thousands for a used lens).
You can also get full spectrum conversions. This conversion removes the cut filter and replaces it with clear glass to get UV, visible and IR, and then you just swap out with the types of filters you want on the front of the lens. This is the economical way to get all three types in one camera, but if you are really into it and have the money, I recommend cameras that were converted for a specific use so you don't need to mess around with all of those filters. Most of the conversion companies do all three types of conversions on most DSLRs and some point and shoots and ILCs.
Now that you have a camera and have selected what type of conversion you want, it is now time to pick who does the conversion. Many conversion companies will sell you a pre-cut filter for your sensor, so you can do it yourself. While this is very possible, there are a lot of things that can go wrong ranging from getting dust trapped between the filter and the sensor which shows up in all of your photos, up to accidentally damaging your image sensor and having to pay full price for it to be fixed or having to replace the camera. For me, this risk is not worth it and I gladly used some of the money I saved buying a used DSLR to pay for the actual conversion by a company who is equipped to do this work. Before picking a conversion service company to do this work, I did a ton of research. There are local shops that do some of these conversions and then there services where you send your camera to them. In both instances, I emphasize to do your research, read some reviews, and pick wisely. There are tons of stories out there of people who brought their camera to a local shop or mail-in service without reading up on them and got back a camera that didn’t work properly. Just do some research n the web for the mail-in places, ask for references for local places, check out the shop and talk to the people there. Also check out their service guarantee and warranty if you can before dropping off your camera. You are probably paying several hundred dollars for the conversion so make sure when you get it back it will be what you want and it working order.
I personally opted to do mine through a mail-in service. While there are several out there, my research narrowed it down to two different places: Life Pixel and MaxMax (LDP llc.). Both of these companies offer the same types of services performed on clean benches, and both have very satisfied customer bases. Their websites also have a lot of info on what to look for in a conversion as well as about IR photography in general. Going through either of these services will give you a great product when you get it back. They make sure to use a pass filter that is the same thickness as the cut filter they remove so as to not introduce potential issues that could affect the image quality. Additionally they also perform a standard recalibration of the autofocus system to be able to focus properly in the infrared rather than visible light. Both also guarantee their work. I will also take this moment to say that my recommendations here are solely based on my own research. I have no association or am given any benefit to recommend either of these two companies other than to share what I have found with other aspiring IR photographers.
As a side note, I’ll talk about focusing in IR more when I get to shooting in IR in just a minute, but know that both companies adjust the autofocus using a lens they chose as a standard lens for your brand of camera. Both websites list what this lens is. This recalibration works for focal lengths in the range, and know that if you put on a lens that has a focal length outside of this range (particularly when you get a lot further out in the long to super telephoto range) you may still need to do some focus adjustments manually.
I chose Life Pixel to do my conversion, but probably would have been just as happy with MaxMax. I only picked Life Pixel because I thought their website was more professional and I liked the information on it better (see kids, marketing does work!). On the flip side, one advantage of MaxMax is that if you request your original cut filter back, they will send it to you whereas Life Pixel will not. This to me was not an issue as I really don’t need it back. If I did want to convert this camera back, both places also do a conversion back to stock, and often at a discount if you did the original conversion through them. As a bonus for me, after I had made up my mind about using Life Pixel, they announced their spring sale where they offered conversion for 50% off the normal price which at the time, was a savings of $225 for a standard 720nm conversion (technically a 715nm at Life Pixel and MaxMax, but similar to a Hoya R72 filter so I call it a 720nm conversion). And yes, as I just stated I did a 720nm conversion because I do like to do some false color work. Overall the conversion took about 2-3 weeks from the day I sent it to the day it came back, and I couldn’t be happier with the work of Life Pixel. It should be noted, and this is true no matter where you do the conversion, a couple of minor features may not work like the "sensor dust off" feature on the D90. There is no really way to avoid this, but 99% of the features still work.
Now that you have your IR camera, either from being converted or if you are using filters on the end of your lens, what considerations do you need to take into account in order to get great shots in infrared? To start, there are some considerations around subject matter. Some of the most dramatic effects in IR photography occur because of how plant life, human skin, the sky and water reflect and absorb infrared light differently than visible light. As such without some of those elements in a photograph, a black and white infrared shot looks nearly identical to a visible light black and white photograph. Nature scenes by the fact they have a lot of plant life tend to look more dramatic than urban scenes. However this does not mean you cannot have some great shots in urban environments. It just means you need to experiment. The most important factor is that you have some level of contrast in your scene just as if you were taking a visible black and white. All other aspects of photography and composition still hold true.
The biggest differences with shooting infrared versus shooting using visible light are more technical in nature. One of the biggest differences is the ability to focus on DSLRs. Cameras, and more importantly lenses, are designed around capturing visible light. As such, the lenses are optimized to focus light with wavelengths in the range of the visible spectrum and not outside of that range. Infrared light focuses a little bit differently due to the longer wavelength. Lens manufacturers, back in the days of film realized this and used marking on the lenses to allow the photographer to manually shift the focus ring to account for this difference. On older prime lenses, this would be marked with a red dot on the focus ring, or in the distance scale. On zoom lenses this often appeared as a red line in the distance scale as the shift differs depending on the focal length of the lens. Unfortunately on most newer lenses, these markings no longer appear (although I’m not entirely sure why). When using newer lenses, and manually focusing, you really need to figure out the focus shift is by trial and error. If using autofocus on a converted DSLR, and it has not been recalibrated, it will not focus properly as it uses a phase change detection which works with visible light. It uses the image bounced up through the mirror in the SLR. This light coming through the lens has not been filtered for infrared only, and in addition the system does not work solely on infrared light. Most conversions, as I mentioned above, include recalibrating the autofocus mechanism to account for the focus shift on a range of focal lengths (usually those in the normal, but also in the short telephoto and wide angle range). This recalibration of the AF system does not allow the system to see infrared, but since visible light is still coming through the lens it focuses using the visible light and the recalibration just intentionally skews the adjustment to the focus in the lens. As I mentioned above, this works for most general shooting, but a shift may still be needed in the longer telephoto range. Through the viewfinder, the image looks a little out of focus, but will be in focus in the image captured by the sensor. For P/S cameras with a weak cut filter and for DSLRs equipped with live view, the contrast detect autofocus system, while inferior for visible light, works great for infrared shooting because it uses the image being detected by the sensor to focus.
Another difference to account for when shooting in IR is metering the proper exposure. On a converted camera, for most purposes the metering for visible light performed by the internal light meter will work fine, but in scenes with a lot of infrared reflecting subjects, or in scenes with a lot of infrared absorbing subjects, some exposure compensation is needed. The best way to figure this out is to take a few photos and look at the exposure on the preview image or, even better, using the histograms. Exposure compensation can vary greatly as the day progresses. At high noon, the sun, a great IR source, will greatly increase the amount of available IR light, much how it is strongest for visible light at noon. Because of the strong source of IR, you may need to purposely underexpose the images when shooting at noon, and dial in some overexposure when shooting early or later in the day. Again, try-then-adjust is the way to figure out if your exposures are coming out properly. If using screw-in filters on the end of your lens, or on a P/S camera, the exposure will be off by quite a bit due to the cut filter in the camera, and that will vary on the camera. Because of this, often long exposure times are needed just to obtain an image. This obviously means using a tripod and picking subjects that are stationary to prevent blur.
Also, as lenses and the coating are designed around visible light, often hotspots and lens flare can occur when using them for IR. What is a hotspot? It is caused by the way the lenses focus the IR light, as well as internal reflections of the light in the lens, and can appear in an image as spot on the photo that is much lighter, or more exposed, than the rest of the image. Often this occurs in the center of the image. For flare, because lens coatings again are designed to reduce flare from visible light, it means that the same lens can be just a prone to flare as if it has not coating at all. What does this mean for the photographer? It means that your $1000 lens may be junk for IR, and your inexpensive kit lens could be fantastic. For some of Nikon’s lenses, this is exactly the case. In fact, one of the best lenses for IR work from Nikon is the 18-55mm f/3.5-5.6G lens that comes with their entry level DSLRs. This lens is only about $150 if bought separately, but it has fantastic performance in IR with little flare and no hotspots. Unfortunately the same cannot be said the 18-105mm kit lens with the D90/D300/D7000 range of camera. Also, some of the relatively expensive lenses from Nikon can have unwanted hot spots. And, although not expensive, the great and versatile 50mm f/1.8D (every Nikon DSLR owner should own one for visible light) has a very strong hot spot in infrared. There can also be variation from lens to lens of the same model, but in general most lenses of the same model perform similarly in IR. The best way to know if your lens works well in IR is to try it, and if you are looking to buy a new lens for IR work, do some research online as there are some great forums for IR photographers where they have compiled lists of good and bad IR performing lenses.
Lastly, when shooting in IR, care must be taken when using flash to supplement the image (A note on future posts, I plan to do one on modifying the light from the flash using gelatin or polyester filters. As such you can use an infrared filter on the flash so it is barely, or not at all, visible to the observer). As most flash, both built in and dedicated units, are great emitters of IR, when in low light situations, particularly when at wide angle lenses, the camera itself can actually block some of the IR, and if there is not another strong IR source nearby, this will cause a very distinct, dark shadow, which is more pronounced than when shooting in visible light. I would equate it to shooting a picture in a pitch black room using a flash, except this can happen in low light situations, like being indoors, when shooting in IR.
This has been a long, but hopefully beneficial post on IR for photographers who may want to try it out. I love shooting in IR almost as much as visible. Some of the dramatic effects of IR really can have a significant impact on the image you are capturing. It is also a great way to pass the time in the middle of the day, between golden hours, when the visible light is too harsh for shooting, but is just right for shooting in IR. Go out and try it!
What is infrared (IR) light? While the exact cutoffs vary based on the source, most agree that visible light has a wavelength ranging from just below 400nm (violet) to right around 800nm (red). Light below the visible range (shorter wavelengths) is ultra-violet, or UV for short, and light just above the visible range (wavelengths longer than 800nm) is known as infrared. I purposely kept this short and as I could easily give a science lesson on this, but for the purposes of this post, this is all you need to know.
The human eye can only detect light in the visible light range and cannot see ultra-violet or infrared light. However, the CCD and CMOS sensors of digital cameras can. The range of most CCD and CMOS sensors is from around 200-250nm up to about 1100-1200nm. It should be noted, that many people, when they hear the term “infrared photography,” immediately think of thermal imagery. While this is also technically a form of infrared photography, as it is measuring heat which is infrared radiation, the wavelengths in thermal imaging are in the far infrared around 14,000 nm. These are much longer wavelengths than the sensitivity of the CCD and CMOS sensors can handle, so special cameras (also pronounced "very expensive") are used for this type of imaging which then convert the signal to a color spectrum that humans can interpret. Again this is not what I am talking about in this post. I am talking about your regular everyday DSLR or P/S camera being able to see and photograph the near infrared light in the range of 800-1100nm. With that clarification aside, let me continue.
So, you have a DSLR or a point and shoot camera, you should be ready to go to shoot some IR shots, right? Not quite. Most camera makers insert a filter directly in front of the image sensor, known as a cut filter, which works to block any IR and UV light front hitting the sensor. Why would they limit the capability of the camera this way? Well in short, the lenses and camera systems were designed to focus and capture visible light and not IR or UV. As such UV and IR light focus differently than visible light (something I’ll touch on a little later) and in some shooting situations can be more intense than the visible light. The resulting effect is a potential for a lot of noise, a photo that looks a bit out of focus, a photo that can be over or underexposed, and in general just a bad photograph. As camera makers are primarily focused on what the majority of photographers want to shoot, visible light, it benefits the camera maker and the photographer to have this cut sensor in place. How do you take photos in infrared if the camera is designed to block the infrared light from hitting the sensor? The cut sensor doesn’t block all IR, but only enough to prevent it from hitting the sensor during the use of normal shutter speeds. In addition to that, the filter in some cameras is better than that in others, with newer cameras having better filers than those in older cameras. Through a couple of techniques these facts still a photographer to take IR shots even with the cut sensor in place.
By leaving the cut sensor in place in the camera, it means that you can still use your camera to take regular visible light photos. However, it also means you must use a filter on the end of the lens to block out the visible light. How come? In this situation you need to consider that the light you are trying to capture, infrared, is making it to the sensor with significantly less intensity than visible light due to the cut filter. By still allowing the visible light through, it very quickly overwhelms the small amount of infrared light able to get through with the actuation of the shutter. By attaching an infrared pass filter to the front of the lens, it blocks the visible light and allows the infrared light through to hit the sensor. Some of you may have already picked up on them, but there are two very big considerations to take into account when taking infrared photos this way. First off, because the cut filter is still in place, the camera is working against the light, meaning you need significantly longer exposure times to give enough IR light a chance to make it to the sensor. Depending on your camera and its cut filter, this could range from a little less than a full second (like on my D40) up to or exceeding a full minute long exposure (my non-converted D90). The difference in the exposure time is due to the quality and strength of the cut filter. The only way to know how long you need to expose is to experiment with your specific camera. The second big consideration, and this applies to the DSLRs, is that due to the design of the camera the viewfinder works by using a mirror to look through the actual lens to focus and frame your shots. With a filter on the front that blocks visible light, the only light making it to the viewfinder is infrared, which you cannot see. It should be noted that most digital P/S, and cameras with electronic viewfinders (EVF) will produce can image however it will be faint due to the cut filter.
Many photographers who are experimenting with IR photography use this technique. It just means that you need to focus and frame and then place the filter on the end of the lens. It also means you absolutely must use a tripod for every shot. But, it also means you can still use your camera for normal visible light photography without having to buy a 2nd camera to get converted just for IR work (a hefty expense especially if you are just trying it out). I myself started this way and have a set of infrared filters in my camera bag. As with all of other types of filters there is a range of functions and performance in the world of infrared filters. I will touch on 3 specific types here, but there are some variations. The three types by their commonly used names are the R72, Wratten 87C, and the RM90.
The R72 designation for the first filter comes from Hoya, a very popular and large manufacturer of glass filters. The truth is that each company gives each filter a name based on its own naming scheme, but the numbers I provided above are the most commonly used names to reference each type of filter. The R72, also known as the Wratten 89B, has 50% cutoff at 720nm. This means that at 720 nm, only 50% of the light with wavelength shorter than 720nm is passing through the filter, and the drop off is pretty quick. This filter is the most common deep-red/infrared, also known as “false color” infrared, filter around. By false color, I mean that the filter still allows the wavelengths for the deep red visible range through as well as the infrared. This allows for some subjects to retain a small portion of color that can be played around with in post processing by performing a channel swap. For this reason, this is a very popular type of filter. IR purists believe that false color is not as artful and is more of a gimmick because it gives the photos a certain look that is not completely IR. My view is that anything you can do to make photograph appealing to an observer or the artist themselves cannot be a gimmick. If you don’t prefer false color IR photos, then you can just opt to not look at them or have an opinion that you don’t like them, but it doesn’t remove any of the artfulness behind taking the photographs.
However the purists do have a point as it is not a true IR photograph. For that, you need to use at least a Wratten 87C filter. The Wratten numbering system for filters was developed by Kodak for their square gelatin filters, and many other people still refer to filter types similar to those made by Kodak by the Wratten number (like how the Hoya R72 is equivalent to a Wratten 89B and vice versa due to their similar cutoff, although the Hoya is a round, glass filter and the Kodak is a square gel). The Wratten 87C has a 50% cutoff at 850nm which is out of the visible range. The effect here is that the image produced out of the camera appears black and white. Areas that reflect a lot of infrared light (such as foliage) appear white and subjects that absorb IR light (such as the sky) appear dark or black. There are 3 other types of the Wratten 87x filters. The Wratten 87B has a 50% cutoff around 900nm and the Wratten 87A has a cutoff around 1000nm. Lastly there is also a Wratten 87 (no letter) that has a cutoff around 770nm. Only the 87C and the 87 are still produced by Kodak, and other manufacturers also make equivalent filters. There are also other manufacturers who make filters similar to the 87B and 87A. One of these is the Hoya RM90. The RM90 like the 87B has a cutoff at 900nm. The effect in the IR is that it gives a very deep contrast to the IR shots as only the best reflectors of IR light show up as white or tones of gray. The problem is that you need very bright sunlight to get these photos (and photos taken with the 87A equivalent RM100).
If you want to try out false color, I recommend a R72 or equivalent filter. There are also filters with lower cutoffs at 650 and 600nm which also let in part of the yellow spectrum, but I didn’t get into those here. If you want true IR, I recommend a Wratten 87C or equivalent. Use of the high cutoff filters are really for people who already are used to working IR or have a need for that level of cutoff. A last and additional note on the Wratten filters is because they are gelatin filters made in square sizes. If you want the screw on type of the end of the lens, you either need to find a holder for this type of filter that screws in (or hold it by hand), or purchase a round screw-in type from another manufacturer like Hoya, Tiffen or B+W.
For point and shoot cameras, some cameras do have brackets available to hold a standard screw in filter in front of the built in lens of the camera (very few have filter threads on the lens). You can also make an inexpensive filter by using some dark tape, a small piece of a narrow cardboard tube, and either a gel or polyester filter (Lee filters makes some inexpensive by good quality Wratten 87 equivalent filters). Another option for the filter is to use an exposed and developed piece of 35mm film (easily obtained from the exposed end of a film roll that has been developed…although as film is harder and harder to come by, so will this inexpensive method). This DIY device can then be held over the end of the lens on your P/S camera. Try doing a web search for this as there are few different DIY photo sites out there with instructions.
If, and only if, you have already picked up a relatively inexpensive screw-in, or square gelatin type filter and tried doing some long exposures. And if, and only if, you plan to take a lot more infrared photos, should you consider a camera conversion. If you never plan to shoot visible light again then you could get your main camera converted. However, as this would be the case with only a very small group of photographers, I recommend picking up a second camera to have it converted. I did exactly this and picked up a used D90 off of EBay. Before I get into the actual conversion, what should look for in a camera to get converted? Basically you want the same things you wanted from your main visible light camera, but with one caveat. For most photographers, the live view function on a DSLR (being able to view the image on the back LCD and you frame and shoot) can be a handy feature for visible light photography (although some never use it like me). But for shooting in IR, live view can be an invaluable tool . I’ll touch on this more when talk about shooting in IR, but for now just know that if you are planning on getting a DSLR for your IR work, I highly recommend getting one with the ability to view and shoot with the image live on the LCD (most DSLRs in the last few years have this feature). Also, I recommend getting a used DSLR whether through a reputable camera shop or after doing your research on EBay. Why? If you get a brand new camera, you do get a warranty, but as soon as you get it is converted, the warranty is then void. So if you get a good used camera with a low number of actuations, it is really no different than one that is brand new with a voided warranty and could save you several hundred bucks (I personally saved $500 by going used with my second DSLR rather than getting one new, and would do it again in a heartbeat).
When doing a camera conversion, either you (if you are really bold) or, the more recommended route, by using a company that specializes in infrared conversions, will open up the camera body, take out the infrared cut filter on the sensor, and replace it with a specific infrared pass filter. The type of conversion you want takes into consideration many of the same ideas as when selecting a type of filter to screw into the end of the lens. You can get one with a cutoff at 650, 720, 810, 850, 900nm, etc. However with that being said, one big consideration is that the filter is permanent so if you have a 900nm conversion, you cannot undo it by just popping out the filter and popping in in IR in a 720nm filter to do some false color work. Because of this, if you enjoy doing false color work often and only want to do true IR every once in a while, I recommend getting a 720nm or similar conversion. You can always put a Tiffen 87 or a Hoya RM90 on the front of the IR camera to get deeper IR just like if you had an unmodified camera, but the exposures would not be nearly as long. Also, an image taken with a 720nm camera and then converted to black and white is similar to one taken with a higher cutoff (don’t kill me IR purists! I know you will argue that’s not true, but note that I said similar). If you absolutely love true IR and only want to do that type, or if you only do false color once in a blue moon, then I recommend an 810 or and 850nm conversions. You can always throw a Hoya R72 on your visible light camera for some long exposures for false color. Because 900 nm and up is so rarely used , I hardly ever recommend getting this conversion as it is very restrictive in your options. But, if it is right for you and your work, go for it.
As an aside, you can also do the same type of conversion on the other end of the spectrum for UV only. There are other considerations to take into account when shooting in UV but I’m not going to cover those here except to say that an example of one of these considerations is that optical glass absorbs some UV light so the best lenses uses quartz elements, but these are very rare and expensive (many thousands for a used lens).
You can also get full spectrum conversions. This conversion removes the cut filter and replaces it with clear glass to get UV, visible and IR, and then you just swap out with the types of filters you want on the front of the lens. This is the economical way to get all three types in one camera, but if you are really into it and have the money, I recommend cameras that were converted for a specific use so you don't need to mess around with all of those filters. Most of the conversion companies do all three types of conversions on most DSLRs and some point and shoots and ILCs.
Now that you have a camera and have selected what type of conversion you want, it is now time to pick who does the conversion. Many conversion companies will sell you a pre-cut filter for your sensor, so you can do it yourself. While this is very possible, there are a lot of things that can go wrong ranging from getting dust trapped between the filter and the sensor which shows up in all of your photos, up to accidentally damaging your image sensor and having to pay full price for it to be fixed or having to replace the camera. For me, this risk is not worth it and I gladly used some of the money I saved buying a used DSLR to pay for the actual conversion by a company who is equipped to do this work. Before picking a conversion service company to do this work, I did a ton of research. There are local shops that do some of these conversions and then there services where you send your camera to them. In both instances, I emphasize to do your research, read some reviews, and pick wisely. There are tons of stories out there of people who brought their camera to a local shop or mail-in service without reading up on them and got back a camera that didn’t work properly. Just do some research n the web for the mail-in places, ask for references for local places, check out the shop and talk to the people there. Also check out their service guarantee and warranty if you can before dropping off your camera. You are probably paying several hundred dollars for the conversion so make sure when you get it back it will be what you want and it working order.
I personally opted to do mine through a mail-in service. While there are several out there, my research narrowed it down to two different places: Life Pixel and MaxMax (LDP llc.). Both of these companies offer the same types of services performed on clean benches, and both have very satisfied customer bases. Their websites also have a lot of info on what to look for in a conversion as well as about IR photography in general. Going through either of these services will give you a great product when you get it back. They make sure to use a pass filter that is the same thickness as the cut filter they remove so as to not introduce potential issues that could affect the image quality. Additionally they also perform a standard recalibration of the autofocus system to be able to focus properly in the infrared rather than visible light. Both also guarantee their work. I will also take this moment to say that my recommendations here are solely based on my own research. I have no association or am given any benefit to recommend either of these two companies other than to share what I have found with other aspiring IR photographers.
As a side note, I’ll talk about focusing in IR more when I get to shooting in IR in just a minute, but know that both companies adjust the autofocus using a lens they chose as a standard lens for your brand of camera. Both websites list what this lens is. This recalibration works for focal lengths in the range, and know that if you put on a lens that has a focal length outside of this range (particularly when you get a lot further out in the long to super telephoto range) you may still need to do some focus adjustments manually.
I chose Life Pixel to do my conversion, but probably would have been just as happy with MaxMax. I only picked Life Pixel because I thought their website was more professional and I liked the information on it better (see kids, marketing does work!). On the flip side, one advantage of MaxMax is that if you request your original cut filter back, they will send it to you whereas Life Pixel will not. This to me was not an issue as I really don’t need it back. If I did want to convert this camera back, both places also do a conversion back to stock, and often at a discount if you did the original conversion through them. As a bonus for me, after I had made up my mind about using Life Pixel, they announced their spring sale where they offered conversion for 50% off the normal price which at the time, was a savings of $225 for a standard 720nm conversion (technically a 715nm at Life Pixel and MaxMax, but similar to a Hoya R72 filter so I call it a 720nm conversion). And yes, as I just stated I did a 720nm conversion because I do like to do some false color work. Overall the conversion took about 2-3 weeks from the day I sent it to the day it came back, and I couldn’t be happier with the work of Life Pixel. It should be noted, and this is true no matter where you do the conversion, a couple of minor features may not work like the "sensor dust off" feature on the D90. There is no really way to avoid this, but 99% of the features still work.
Now that you have your IR camera, either from being converted or if you are using filters on the end of your lens, what considerations do you need to take into account in order to get great shots in infrared? To start, there are some considerations around subject matter. Some of the most dramatic effects in IR photography occur because of how plant life, human skin, the sky and water reflect and absorb infrared light differently than visible light. As such without some of those elements in a photograph, a black and white infrared shot looks nearly identical to a visible light black and white photograph. Nature scenes by the fact they have a lot of plant life tend to look more dramatic than urban scenes. However this does not mean you cannot have some great shots in urban environments. It just means you need to experiment. The most important factor is that you have some level of contrast in your scene just as if you were taking a visible black and white. All other aspects of photography and composition still hold true.
The biggest differences with shooting infrared versus shooting using visible light are more technical in nature. One of the biggest differences is the ability to focus on DSLRs. Cameras, and more importantly lenses, are designed around capturing visible light. As such, the lenses are optimized to focus light with wavelengths in the range of the visible spectrum and not outside of that range. Infrared light focuses a little bit differently due to the longer wavelength. Lens manufacturers, back in the days of film realized this and used marking on the lenses to allow the photographer to manually shift the focus ring to account for this difference. On older prime lenses, this would be marked with a red dot on the focus ring, or in the distance scale. On zoom lenses this often appeared as a red line in the distance scale as the shift differs depending on the focal length of the lens. Unfortunately on most newer lenses, these markings no longer appear (although I’m not entirely sure why). When using newer lenses, and manually focusing, you really need to figure out the focus shift is by trial and error. If using autofocus on a converted DSLR, and it has not been recalibrated, it will not focus properly as it uses a phase change detection which works with visible light. It uses the image bounced up through the mirror in the SLR. This light coming through the lens has not been filtered for infrared only, and in addition the system does not work solely on infrared light. Most conversions, as I mentioned above, include recalibrating the autofocus mechanism to account for the focus shift on a range of focal lengths (usually those in the normal, but also in the short telephoto and wide angle range). This recalibration of the AF system does not allow the system to see infrared, but since visible light is still coming through the lens it focuses using the visible light and the recalibration just intentionally skews the adjustment to the focus in the lens. As I mentioned above, this works for most general shooting, but a shift may still be needed in the longer telephoto range. Through the viewfinder, the image looks a little out of focus, but will be in focus in the image captured by the sensor. For P/S cameras with a weak cut filter and for DSLRs equipped with live view, the contrast detect autofocus system, while inferior for visible light, works great for infrared shooting because it uses the image being detected by the sensor to focus.
Another difference to account for when shooting in IR is metering the proper exposure. On a converted camera, for most purposes the metering for visible light performed by the internal light meter will work fine, but in scenes with a lot of infrared reflecting subjects, or in scenes with a lot of infrared absorbing subjects, some exposure compensation is needed. The best way to figure this out is to take a few photos and look at the exposure on the preview image or, even better, using the histograms. Exposure compensation can vary greatly as the day progresses. At high noon, the sun, a great IR source, will greatly increase the amount of available IR light, much how it is strongest for visible light at noon. Because of the strong source of IR, you may need to purposely underexpose the images when shooting at noon, and dial in some overexposure when shooting early or later in the day. Again, try-then-adjust is the way to figure out if your exposures are coming out properly. If using screw-in filters on the end of your lens, or on a P/S camera, the exposure will be off by quite a bit due to the cut filter in the camera, and that will vary on the camera. Because of this, often long exposure times are needed just to obtain an image. This obviously means using a tripod and picking subjects that are stationary to prevent blur.
Also, as lenses and the coating are designed around visible light, often hotspots and lens flare can occur when using them for IR. What is a hotspot? It is caused by the way the lenses focus the IR light, as well as internal reflections of the light in the lens, and can appear in an image as spot on the photo that is much lighter, or more exposed, than the rest of the image. Often this occurs in the center of the image. For flare, because lens coatings again are designed to reduce flare from visible light, it means that the same lens can be just a prone to flare as if it has not coating at all. What does this mean for the photographer? It means that your $1000 lens may be junk for IR, and your inexpensive kit lens could be fantastic. For some of Nikon’s lenses, this is exactly the case. In fact, one of the best lenses for IR work from Nikon is the 18-55mm f/3.5-5.6G lens that comes with their entry level DSLRs. This lens is only about $150 if bought separately, but it has fantastic performance in IR with little flare and no hotspots. Unfortunately the same cannot be said the 18-105mm kit lens with the D90/D300/D7000 range of camera. Also, some of the relatively expensive lenses from Nikon can have unwanted hot spots. And, although not expensive, the great and versatile 50mm f/1.8D (every Nikon DSLR owner should own one for visible light) has a very strong hot spot in infrared. There can also be variation from lens to lens of the same model, but in general most lenses of the same model perform similarly in IR. The best way to know if your lens works well in IR is to try it, and if you are looking to buy a new lens for IR work, do some research online as there are some great forums for IR photographers where they have compiled lists of good and bad IR performing lenses.
Lastly, when shooting in IR, care must be taken when using flash to supplement the image (A note on future posts, I plan to do one on modifying the light from the flash using gelatin or polyester filters. As such you can use an infrared filter on the flash so it is barely, or not at all, visible to the observer). As most flash, both built in and dedicated units, are great emitters of IR, when in low light situations, particularly when at wide angle lenses, the camera itself can actually block some of the IR, and if there is not another strong IR source nearby, this will cause a very distinct, dark shadow, which is more pronounced than when shooting in visible light. I would equate it to shooting a picture in a pitch black room using a flash, except this can happen in low light situations, like being indoors, when shooting in IR.
This has been a long, but hopefully beneficial post on IR for photographers who may want to try it out. I love shooting in IR almost as much as visible. Some of the dramatic effects of IR really can have a significant impact on the image you are capturing. It is also a great way to pass the time in the middle of the day, between golden hours, when the visible light is too harsh for shooting, but is just right for shooting in IR. Go out and try it!
Monday, May 16, 2011
Zooms and Primes – What’s a better choice?
If you haven’t noticed, I like to know a lot about things that I work with. I thrive off information. I think it makes me better at my job, and also better at my hobbies, but tends mean that my though processes, and as a result my blog posts, tend to be fairly lengthy. So, after 3 massively long posts, I think I may try to make this one a little more succinct. This week’s topic is another one where point and shoot users will likely only find intellectually interesting as there are not a lot of applications for the usual P/S camera. In fact, it may be tough today to find a standard P/S camera today that has anything but a zoom lens on it. Why? Because you only get the one lens, so you might as well build it with versatility. This week’s topic is again for DSLR users and of course mirrorless interchangeable lens cameras (ILCs). So what is it? Well if you are familiar with cameras already, then the title gives it completely away. But, if you are new to the world, you may not know the terms, what they are, how they are different, and which is better. Today’s post is on zoom lenses and prime lenses and the advantages and disadvantages of both. And before I start, I realized when I started writing this one that it may have been a better post for later on after I go through the different focal lengths of lenses, there is some information here which is relevant to those future posts which is why I did it in this order. Also, while I am trying to do some of this in somewhat of a logical order, I do plan on expanding to some slightly more advanced topics in the future and then I’ll come back to some of the basics, and so on, but for now I’m trying to keep many of the basics up front in case you are reading through these chronologically.
For DSLR and ILC camera users, there are effectively two types of lenses to choose from. This is regardless of what brand, mount, image sensor type, etc, that you have chosen. The two types of lenses are zoom lenses and prime lenses. So what am I talking about? Well, most people are probably familiar with the term “zoom” and likely can figure out what a zoom lens can do. A zoom lens is a lens where the user can adjust the focal length, and as a result, the view of the subject as it relates to a wide or narrow area of that subject is hitting the image sensor. What then is a prime lens? As you might guess, it is the opposite of a zoom lens. It is a lens with a fixed focal length. Well, I realize now that anyone new to the world of DSLRs and understanding lens selection may be wondering what exactly is focal length (I promise we’ll get right back to the two types of lenses, their advantages and disadvantages).
**Mild Tangent Alert**
Focal length is technically the distance of the optical center of the lens to the sensor plane (or film plane) when focused to infinity (farthest focus on your lens). So theoretically for a 100mm lens, the optical center of the lens is 100mm away from the sensor when the lens is focused at infinity. This gets a little more complicated as most lenses today and for well before the existence of SLR cameras, have used a retrofocal design. In a symmetrical optical lens setups, there were be roughly an equal number and symmetrical positioning of lens elements, so as light was collected by the front elements, it would be reproduced on the same scale (angle of diffraction) as it was emitted from the back elements. A retrofocal design uses an asymmetrical setup of the lens elements, where there are more elements of narrowing diameter towards the back of the lens as compared to the front. This allows designers to shift the location of the optical center, even to the point of moving behind the last element, or in front of the front element of the lens (essentially the optical center is in the camera body). Without a retrofocal design, it would not be possible to have a lens with a shorter focal length (wide-angle and even normal) as the lens would have to be mounted essentially only a millimeter or two from the sensor in order to get the optical center close enough and to produce an image circle small enough for the image sensor of the SLR. Mounting a lens this close would get in the way of the workings of the camera. As such, the distance between the sensor and the lens on most SLRs is at least 40-50mm and that does not include the distance to the optical center of the lens, making it impossible to get a lens with a shorter focal length than say 75 or 85mm using a symmetrical design. On the flip side, super-telephoto lenses, would be much longer than they already are. And there’s more to it, but basically know that more symmetrical optical lens designs are not compatible with, and thus not used for, SLRs and point and shoot cameras. It should be noted, that symmetrical lenses can be used on some larger format cameras, but never on an SLR, or point and shoot.
Ok, so enough about this for now. I’ll talk more about focal length in upcoming posts on the different groups of focal lengths for lenses: super wide-angle, wide-angle, normal, short telephoto, telephoto and super telephoto. In short, the larger the focal length, usually in mm, the more magnification power you have for distant object, but also a narrower angle of view (of the total 360 degrees around you head as you have camera up to your eye, you may only be able to see a couple of degrees of that). The opposite is true for shorter focal lengths; less magnification and wider angle of view.
**Mild Tangent Over**
After that brief design less, I’m now back on topic. So you have your camera body, and you want to pick a lens. Should you buy primes or zoom lenses? Giving away the punch line, each of the two types has their advantages and disadvantages.
If you have bought a camera kit, body with a lens, chances are that lens is a relatively inexpensive zoom lens. The reason for this is that the zoom lens gives you more versatility, and if you are just buying your first camera and get a kit, chances are you don’t have any other lenses to use. This is the biggest advantage of a zoom lens. (As an aside it should be noted that a true zoom lens is a parfocal zoom which means as you zoom in and out, the focus of the lens should not change. However, due to the expense of producing this style lens, the majority of zooms today are varifocal in type, meaning that you will lose focus as you zoom in and out. While more inconvenient for the photographer, it really is not a huge deal as you just refocus when you get to the zoom you want.) Zoom lenses by their very nature are more versatile than prime lenses, because you essentially get a range of coal length s to use with the twist of the zoom ring, and without having to change lenses. This means you can quickly adjust from one focal length to another without the time and expense changing between multiple primes, while also eliminating the risk of getting dirt and dust inside the cameras as you swap out lenses. I personally own several zoom lenses and this ease of use is exactly why. As an example, the kit lens that comes with my D90 is an 18-105mm zoom lens. This lens allows me to shoot at 18mm which is decently wide and then quickly zoom in on a subject using the telephoto range of the 105mm length, and hit every focal length in between. Nikon also makes a fantastic 18-200mm zoom which has even more versatility (and overall is a better lens, but at twice the price). There is also a class of “super zooms” which essentially is a zoom lens with a range exceeding 6x. Technically the 18-200mm is a super zoom. Sigma makes a lens that ranges from 50mm (a normal focal length) out to 500mm (a super telephoto focal length) all in one lens. This is a lot of flexibility to have and use with the just the twist of a zoom ring.
You may ask then, if you can get all of these focal lengths in one zoom, why in the world would you own a prime lens? Well, the answer is simple. In general, zoom lenses are inferior to prime lenses in almost every other way (with a few exceptions, such as the Nikon Nikkor 14-24mm zoom which many consider to be the gold standard for wide angle zooms, and surpasses most wide angle prime lenses). Zoom lenses typically have a limit of how wide of an aperture that is available, and many have variable maximum aperture sizes depending on the focal length you are using. For example the high end 70-200mm zoom lenses from Nikon can have a constant maximum aperture of f/2.8 across the range, which is decently wide, but is two stops slower than say a Nikon 85mm f/1.4. Constant aperture for a zoom lenses is also typically only found on the high end, professional zooms lenses which usually start above $1500 and can go up to several thousand. Most lower end zooms that most people have the budget for, have a variable aperture across the zoom range. For example, the kit lenses I mentioned is listed as a Nikkor 18-105mm f/3.5-5.6. This means that at 18mm it has a maximum aperture of f/3.5, but at 105mm it has a maximum aperture of f/5.6. In between it will decrease the maximum aperture from f/3.5 to f/5.6 as the focal length is increased from 18mm to 105mm. Either way, these apertures are much slower than the equivalent primes and the high end zooms.
Zoom lenses are also comparably more expensive than a related prime with similar image quality. Because lenses that cover multiple focal lengths need a more complex design, that often means they are more expensive. The flip side of this is a zoom lens of comparable price to a prime will have a lower image quality. Because the manufacturers are trying to maximize image quality at multiple lengths, often times there is a sacrifice for quality at each specific focal length. The saying here goes, “jack of all trades, master at none.” The complex design can often mean that there is additional chromatic aberration or distortion not seen in an equivalent length primes lens. Again, this is not always true, but it is more often than not. As such a zoom lens with comparable image quality as the related prime at a given focal length (for example, a Sigma 50-500mm set at 400mm is going to be nowhere near a Sigma prime lens of 400mm focal length.
Zoom lenses are also heavier and more complicated because they need to contain more glass elements and moving parts to properly focus the light across a range of focal lengths. The weight of a lens at shorter focal length is not often a huge concern, but when you get into longer lenses, the weight can make the difference between being able to handhold a shot, or not. The more glass and moving parts, in addition to increasing cost and weight of the lens, also means that there are more changes for the lens to malfunction or have a design flaw. Again, this is generally speaking.
The biggest benefit of prime lenses is image quality. The lens is designed from scratch to work at one focal length and therefore more fine tuned to product a sharp, rich image. All of the disadvantages of the zoom lens found above are advantages in primes, but on the opposite end, the prime lens is limited to the one focal length.
It should be noted though that lenses of 400mm and up, often carry a very hefty price tag ranging up to and in many cases, exceeding $10,000. These are finally engineered, professional lenses, and are often only found as primes (although Sigma has made a 200-500mm f/2.8 zoom which works really well, but sells for $35,000).
So which should you choose? Do the disadvantages of a zoom outweigh the versatility benefit? Not necessarily. Zoom lenses are great and for most every day photographer, they produce great images. I think the benefit and flexibility of zooms is a huge advantage, but do you research and read reviews. There are a bunch of great review sites out there and people have opinions on whether or not a lens produces good images. And, don’t let price fool you either. Nikon produced a rather pricey 24-120mm which produced junk pictures, but the $150 18-55mm kit lens that came with my D40 produces great images. That being said, there are places for primes. Aside from the long focal lengths is you are into wildlife photography, I think that every photographer should own a 50mm fast ( f/1.4 or f/1.8) prime lens. Ansel Adams was famously known for only using this one lens for all of his shots, and everyone of them is fantastic. This fast primes will give great photos and you can easily make up for the lack of versatility by moving closer and farther away from the subject. The bottom line is, that there is a place for zoom lenses and prime lenses in your photography bag. Do you research on your lens and buy wisely, and you will be happy.
For DSLR and ILC camera users, there are effectively two types of lenses to choose from. This is regardless of what brand, mount, image sensor type, etc, that you have chosen. The two types of lenses are zoom lenses and prime lenses. So what am I talking about? Well, most people are probably familiar with the term “zoom” and likely can figure out what a zoom lens can do. A zoom lens is a lens where the user can adjust the focal length, and as a result, the view of the subject as it relates to a wide or narrow area of that subject is hitting the image sensor. What then is a prime lens? As you might guess, it is the opposite of a zoom lens. It is a lens with a fixed focal length. Well, I realize now that anyone new to the world of DSLRs and understanding lens selection may be wondering what exactly is focal length (I promise we’ll get right back to the two types of lenses, their advantages and disadvantages).
**Mild Tangent Alert**
Focal length is technically the distance of the optical center of the lens to the sensor plane (or film plane) when focused to infinity (farthest focus on your lens). So theoretically for a 100mm lens, the optical center of the lens is 100mm away from the sensor when the lens is focused at infinity. This gets a little more complicated as most lenses today and for well before the existence of SLR cameras, have used a retrofocal design. In a symmetrical optical lens setups, there were be roughly an equal number and symmetrical positioning of lens elements, so as light was collected by the front elements, it would be reproduced on the same scale (angle of diffraction) as it was emitted from the back elements. A retrofocal design uses an asymmetrical setup of the lens elements, where there are more elements of narrowing diameter towards the back of the lens as compared to the front. This allows designers to shift the location of the optical center, even to the point of moving behind the last element, or in front of the front element of the lens (essentially the optical center is in the camera body). Without a retrofocal design, it would not be possible to have a lens with a shorter focal length (wide-angle and even normal) as the lens would have to be mounted essentially only a millimeter or two from the sensor in order to get the optical center close enough and to produce an image circle small enough for the image sensor of the SLR. Mounting a lens this close would get in the way of the workings of the camera. As such, the distance between the sensor and the lens on most SLRs is at least 40-50mm and that does not include the distance to the optical center of the lens, making it impossible to get a lens with a shorter focal length than say 75 or 85mm using a symmetrical design. On the flip side, super-telephoto lenses, would be much longer than they already are. And there’s more to it, but basically know that more symmetrical optical lens designs are not compatible with, and thus not used for, SLRs and point and shoot cameras. It should be noted, that symmetrical lenses can be used on some larger format cameras, but never on an SLR, or point and shoot.
Ok, so enough about this for now. I’ll talk more about focal length in upcoming posts on the different groups of focal lengths for lenses: super wide-angle, wide-angle, normal, short telephoto, telephoto and super telephoto. In short, the larger the focal length, usually in mm, the more magnification power you have for distant object, but also a narrower angle of view (of the total 360 degrees around you head as you have camera up to your eye, you may only be able to see a couple of degrees of that). The opposite is true for shorter focal lengths; less magnification and wider angle of view.
**Mild Tangent Over**
After that brief design less, I’m now back on topic. So you have your camera body, and you want to pick a lens. Should you buy primes or zoom lenses? Giving away the punch line, each of the two types has their advantages and disadvantages.
If you have bought a camera kit, body with a lens, chances are that lens is a relatively inexpensive zoom lens. The reason for this is that the zoom lens gives you more versatility, and if you are just buying your first camera and get a kit, chances are you don’t have any other lenses to use. This is the biggest advantage of a zoom lens. (As an aside it should be noted that a true zoom lens is a parfocal zoom which means as you zoom in and out, the focus of the lens should not change. However, due to the expense of producing this style lens, the majority of zooms today are varifocal in type, meaning that you will lose focus as you zoom in and out. While more inconvenient for the photographer, it really is not a huge deal as you just refocus when you get to the zoom you want.) Zoom lenses by their very nature are more versatile than prime lenses, because you essentially get a range of coal length s to use with the twist of the zoom ring, and without having to change lenses. This means you can quickly adjust from one focal length to another without the time and expense changing between multiple primes, while also eliminating the risk of getting dirt and dust inside the cameras as you swap out lenses. I personally own several zoom lenses and this ease of use is exactly why. As an example, the kit lens that comes with my D90 is an 18-105mm zoom lens. This lens allows me to shoot at 18mm which is decently wide and then quickly zoom in on a subject using the telephoto range of the 105mm length, and hit every focal length in between. Nikon also makes a fantastic 18-200mm zoom which has even more versatility (and overall is a better lens, but at twice the price). There is also a class of “super zooms” which essentially is a zoom lens with a range exceeding 6x. Technically the 18-200mm is a super zoom. Sigma makes a lens that ranges from 50mm (a normal focal length) out to 500mm (a super telephoto focal length) all in one lens. This is a lot of flexibility to have and use with the just the twist of a zoom ring.
You may ask then, if you can get all of these focal lengths in one zoom, why in the world would you own a prime lens? Well, the answer is simple. In general, zoom lenses are inferior to prime lenses in almost every other way (with a few exceptions, such as the Nikon Nikkor 14-24mm zoom which many consider to be the gold standard for wide angle zooms, and surpasses most wide angle prime lenses). Zoom lenses typically have a limit of how wide of an aperture that is available, and many have variable maximum aperture sizes depending on the focal length you are using. For example the high end 70-200mm zoom lenses from Nikon can have a constant maximum aperture of f/2.8 across the range, which is decently wide, but is two stops slower than say a Nikon 85mm f/1.4. Constant aperture for a zoom lenses is also typically only found on the high end, professional zooms lenses which usually start above $1500 and can go up to several thousand. Most lower end zooms that most people have the budget for, have a variable aperture across the zoom range. For example, the kit lenses I mentioned is listed as a Nikkor 18-105mm f/3.5-5.6. This means that at 18mm it has a maximum aperture of f/3.5, but at 105mm it has a maximum aperture of f/5.6. In between it will decrease the maximum aperture from f/3.5 to f/5.6 as the focal length is increased from 18mm to 105mm. Either way, these apertures are much slower than the equivalent primes and the high end zooms.
Zoom lenses are also comparably more expensive than a related prime with similar image quality. Because lenses that cover multiple focal lengths need a more complex design, that often means they are more expensive. The flip side of this is a zoom lens of comparable price to a prime will have a lower image quality. Because the manufacturers are trying to maximize image quality at multiple lengths, often times there is a sacrifice for quality at each specific focal length. The saying here goes, “jack of all trades, master at none.” The complex design can often mean that there is additional chromatic aberration or distortion not seen in an equivalent length primes lens. Again, this is not always true, but it is more often than not. As such a zoom lens with comparable image quality as the related prime at a given focal length (for example, a Sigma 50-500mm set at 400mm is going to be nowhere near a Sigma prime lens of 400mm focal length.
Zoom lenses are also heavier and more complicated because they need to contain more glass elements and moving parts to properly focus the light across a range of focal lengths. The weight of a lens at shorter focal length is not often a huge concern, but when you get into longer lenses, the weight can make the difference between being able to handhold a shot, or not. The more glass and moving parts, in addition to increasing cost and weight of the lens, also means that there are more changes for the lens to malfunction or have a design flaw. Again, this is generally speaking.
The biggest benefit of prime lenses is image quality. The lens is designed from scratch to work at one focal length and therefore more fine tuned to product a sharp, rich image. All of the disadvantages of the zoom lens found above are advantages in primes, but on the opposite end, the prime lens is limited to the one focal length.
It should be noted though that lenses of 400mm and up, often carry a very hefty price tag ranging up to and in many cases, exceeding $10,000. These are finally engineered, professional lenses, and are often only found as primes (although Sigma has made a 200-500mm f/2.8 zoom which works really well, but sells for $35,000).
So which should you choose? Do the disadvantages of a zoom outweigh the versatility benefit? Not necessarily. Zoom lenses are great and for most every day photographer, they produce great images. I think the benefit and flexibility of zooms is a huge advantage, but do you research and read reviews. There are a bunch of great review sites out there and people have opinions on whether or not a lens produces good images. And, don’t let price fool you either. Nikon produced a rather pricey 24-120mm which produced junk pictures, but the $150 18-55mm kit lens that came with my D40 produces great images. That being said, there are places for primes. Aside from the long focal lengths is you are into wildlife photography, I think that every photographer should own a 50mm fast ( f/1.4 or f/1.8) prime lens. Ansel Adams was famously known for only using this one lens for all of his shots, and everyone of them is fantastic. This fast primes will give great photos and you can easily make up for the lack of versatility by moving closer and farther away from the subject. The bottom line is, that there is a place for zoom lenses and prime lenses in your photography bag. Do you research on your lens and buy wisely, and you will be happy.
Monday, May 9, 2011
Oops, I Cropped My Sensor
In last week’s post, “The Hook-Up – When Bodies and Lenses Get Mounted,” I spent a lot of words covering an important aspect to mating lenses and camera bodies. For those of you who already have DSLR, and some experience with lens mounts, I apologize if it was a little fundamental, but hopefully the history included in the post was at least interesting. If you are new to the world of SLR/DSLR, it hopefully demonstrated the main point that not all cameras and lenses will work together. This week I’m taking a dive into a topic that affects not only your choice of a camera body and lenses, but also has implications for how well you camera combats noise. A note for P/S camera users, this one affects you too. Also, let me reiterate that this blog is primarily about DLSRs and occasionally P/S cameras, but if you are looking for information on digital medium format cameras or other varieties, you may still find some of this information relevant even though I may only briefly mention them. So now into the world of sensor size…
Back in the 1940s and 1950s, when film SLR cameras were first coming on the scene, the format of choice for capturing the actual photograph was 35mm film. Life was pretty simple as far as size went. The real area of choice was which brand and specific line of film you wanted to use as each one had slightly different characteristics. Also you had to choose between black and white or color film (although all early film was black and white). The differences were in the chemistry used to create the particular blend emulsion that was applied to the plastic substrate to react to the light. But, with all of that, there was just one size for SLRs. Even when compact point and shoot cameras came out, they still used 35mm film. As an aside images on 35mm film are actually 36mm x 24mm per frame. The term 35mm film (more accurately known as 135 film based on the standard developed by Kodak) refers to the width of the film including the perforations on the edges allowing the film to be advanced.
When Nikon was designing the first consumer digital SLR, the Nikon D1, prior to its launch back in 1999, they had to make a decision. Do they keep the standard full-frame sized sensor, or to they make it smaller? At this time they could easily make image sensors smaller than full frame. If you did or did not know, digital sensors have been in use in government and industrial applications since the 1970s, the first electronic point and shoots came out in the 1980s with first Sony Mavica, and the first true digital point and shoot cameras in the 1990s. However the extra area required for SLR style photography, with lower pixel density (remember the D1 only had 2.7MP) would have been too expensive and potentially result in a worse photograph produced. So they developed the first DSLR to have a cropped sensor, which they have since trademarked as the DX size sensor. All that is meant by cropped sensor is that the area of the image sensor is smaller than the standard 35mm frame (36mm x 24mm). For the DX sensor the dimensions in height and width is 1.52x (known as a crop factor) smaller than a standard 35mm frame. As a result is has an area only about 42% of the 35mm frame. The DX sensor size is in a class of image sensors with sizes similar to the Advanced Photo System – Classic, or APS-C, film size. Other manufacturers have similar sized sensors that also are classified as APS-C, but they are all slightly different in dimension. There are also sensors that are similar to the slightly larger APS-H film size and some that are smaller such as the Four Thirds standard size. Here are some of the common brands and their sensor sizes for medium format, DSLR and point and shoot cameras:
Camera Type | Camera Brand | Sensor Type | Aspect Ratio (W:H) | Height | Width | Area | Crop Factor* |
Medium format | Multiple | Medium format film, Medium format digital | 4:3 | 36 mm | 48 mm | 1728 mm2 | 0.75x |
SLR/DSLR | Multiple | 35 mm film, Full-frame digital SLR | 3:2 | 24 mm | 36 mm | 864 mm2 | 1x |
Canon Kodak Leica | APS-H | 19 mm | 28.7 mm | 545 mm2 | 1.3x | ||
Nikon (DX) Pentax Sony Fuji | APS-C | 15.7 mm | 23.6 mm | 371 mm2 | 1.5x | ||
Canon | APS-C | 14.8 mm | 22.2 mm | 329 mm2 | 1.6x | ||
Sigma | Foveon X3 | 13.8 mm | 20.7 mm | 286 mm2 | 1.7x | ||
Olympus Panasonic Leica | Four Thirds | 4:3 | 13 mm | 17.3 mm | 225 mm2 | 2.0x | |
Point and Shoot (Compact Digital) | Multiple† | 1/1.6” | 4:3 | 6.01 mm | 8.08 mm | 49 mm2 | 4.3x |
1/1.7” | 5.70 mm | 7.60 mm | 43 mm2 | 4.6x | |||
1/1.8” | 5.32 mm | 7.18 mm | 38 mm2 | 4.8x | |||
1/2” | 4.80 mm | 6.40 mm | 31 mm2 | 5.4x | |||
1/2.3” | 4.62 mm | 6.16 mm | 28 mm2 | 5.6x | |||
1/2.5” | 4.29 mm | 5.76 mm | 25 mm2 | 6.0x | |||
1/2.7” | 4.04 mm | 5.37 mm | 22 mm2 | 6.4x | |||
1/3” | 3.60 mm | 4.80 mm | 17 mm2 | 7.2x | |||
1/3.2” | 3.42 mm | 4.54 mm | 16 mm2 | 7.6x | |||
1/3.6” | 3.00 mm | 4.00 mm | 12 mm2 | 8.7x | |||
1/4” | 2.40 mm | 3.20 mm | 8 mm2 | 10.8x | |||
1/6” | 1.80 mm | 2.40 mm | 4 mm2 | 14.1x | |||
1/8” | 1.20 mm | 1.60 mm | 2 mm2 | 21.7x |
*Relative to the standard 35mm film frame.
†Unlike DSLR cameras, often manufacturers of point and shoot cameras do not stick with a single size sensors between its lines of cameras. Selecting the sensor size is secondary to the size and ergonomics of the camera, whereas, often size and ergonomics in the DSLR are designed around the image sensor chosen for its image properties.
There is a note on similar formats above. The height and width, and as a result the area and crop factor, may vary slightly between manufacturers and also between individual camera models from the same manufacturer. For example, the Nikon DX crop factor is actually 1.52x, whereas Pentax is 1.53x or 1.54x depending on the particular model. As another example, the Leica M8 sensor is an APS-H size but it actually has a crop factor of 1.33x rather than 1.28x for the Canon 1D MarkIII and the 1.29x for the 1D MarkIV. It should also be noted that this is also true for users of full-frame and medium format cameras, with sensors only being approximately the size of the standard 35mm and medium format film frame, respectively. For example the full-frame Nikon FX sensor in the D3 is actually 36mm by 23.9mm. The thing to take from this is that the slight variances in this dimensions of the sensors do not make a significant difference between similar camera types that a photographer would notice until the difference approaches 0.1x (why the Canon 1.6x crop factor is listed separately from the other 1.5x crop factors, but both are APS-C).
The consumer digital SLR world was born with Nikon DX crop sensor and it looked to stay that way. In fact, Nikon even stated that there would never be a need to produce a DSLR with a full frame sensor as there was no need. Cropped sensors were capable of producing great images and all pre-existing lenses would work as they produced an image circle that was meant for full-frame film, so it would obviously cover the smaller area of the APS-C sensor. So why, in 2011 at the time of the writing, do we have DSLRs that have full-frame sized sensors. For that we’ll have to take a look a little deeper in to the world of cropped sensors, their sizes, their advantages and disadvantages, and also the advantages that were discovered by having a larger image sensor area.
Let’s say you are at the local camera shop looking to buy a new, or perhaps your first, DSLR. You have narrowed it down to brand and features, but there are two camera models that are exactly the same except one utilizes a 1.5x crop sensor (let’s call this CropPhoto) and the other uses a full-frame sensor (let’s call this FullPhoto. Which do you choose? They both have the same number of pixels, so what’s the difference? Well, there are a few differences, most of which will be noticed while practically using the camera and at least one major point that actually makes a difference from the technical quality of the photograph produced.
Functionally the camera works exactly the same. On both cameras you attach the same lens (for the sake of this argument we will say a standard lens designed for a 35mm SLR, more on this in a bit), you focus the light the same way, and you capture the photograph the same way by actuating the shutter. However, because of the smaller size of a cropped sensor, you perceived focal length is actually different. But, isn’t focal length was a function of the lens? Well yes, you are right, but there’s more to it. Focal length is a function of the lens, however the perceived focal length is a function of the size of the sensor, whether it be film or digital. What’s the difference? Lenses are designed to focus light on to a single plane (the sensor of the camera). The image circle created by the lens is exactly the same when mounted on CropPhoto as it is when mounted on FullPhoto. The difference is that although the image circle is the same, the area of the image that hits the image sensor differs. Here’s a simple drawing to show you what I mean:
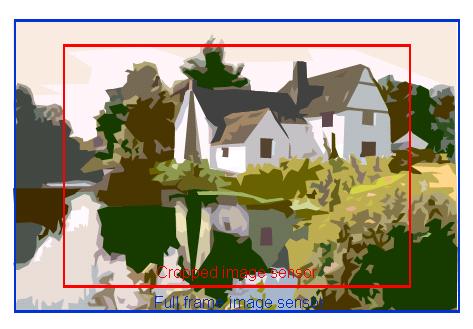
As you probably can already tell, the CropPhoto camera captures less area of the image circle on the sensor as compared to the FullPhoto camera and its full frame sensor. As we already established, these two cameras have the same number of pixels on the sensor, and as such can assume that the pixels on the cropped sensor are smaller than those on the full frame sensor (a good assumption). As such, if you were to take the same image from each sensor and make the pixels the same size you would see that the area captured on the cropped sensor appears to be taken with a lens with a longer focal length. That’s what a perceived focal length is. Although using the same lens, the image produced is zoomed in a little bit.

Well, what does this mean? Well by using the crop factor above, you can actually figure out what the perceived focal length is. Say the lens you are using has a focal length of 100mm. This lens has a perceived focal length of 100mm on the full frame sensor. For this example, the cropped sensor has a crop factor of 1.5x, meaning it has a perceived focal length of 150mm (1.5 x 100mm = 150mm). Ok, so perceived length of my lens is longer, so what? Well if we started with a cropped sensor size, then there would not be much impact, but as most equipment and photographers are calibrated to work using 35mm film or the digital equivalent, this means that all of a sudden, you normal 50mm lens, isn’t so normal any more. It’s actually no considered a short telephoto as it has a perceived focal length (also commonly referred to as the “35mm equivalent focal length”) of 75mm. Also, it means for all you birders and astrophotography guys, it means your 300mm telephoto lens, just got a bump to a super-telephoto at a perceived focal length, of 450mm or even better your 600mm just went nuts out to 900mm. Pretty awesome, right? Well kind of. It also means your 14mm ultra wide angle, just got less wide at 21mm, and the 85mm lens you loved using for portraits, just got a little long at 127.5mm. Also, as the world is still calibrated to 35mm frames, there is no a little bit of math involved to figure out which lens works best now. For new photographers, this isn’t so bad, and it takes a little adjustment if you have already used to working with full-frame. Cropped sensors have advantages at the long end at a trade off of disadvantages on the short end. Now lens manufacturers have combated this disadvantage by releasing lenses with even shorter focal length to regain that ultra-wide angle segment. For example I have a 10-24mm wide angle zoom which has a perceived focal length of 15-36mm, the low end of that being right in there with a 14mm ultra-wide lens however it is designed for cropped sensors, another concept I’ll explain now.
Lens manufacturers also found a benefit of the cropped sensor. They could now design lens that would produce a smaller image circle. Fortunately for the manufacturers, this actually means less glass, less engineering and less cost, while the photographer received lens with a little less weight and lower prices. Great, right? Well, as I mentioned above, the world of cameras in strewn with a myriad of different sized sensors, and there is still very much a preference for the full frame size. What this means is that unfortunately for the photographer, a lens designed for a cropped sensor camera will not work properly on a full-frame camera, however the opposite is not true. This picture illustrates why this happens (and please recognize that this is a conceptual drawing and now scaled to the actual dimensions of the sensor or circle size).

Now a huge deal if you stick with cropped sensor cameras as you have your pick of lenses from both groups, but if you ever upgrade to a semi-pro or professional camera with a full-frame sensor, you will not be able you use those lenses to capture a full-frame image. The cropped lens with severely vignette (meaning a significant drop-off in light) at the corners and edges of the frame. So if you have plans to upgrade in the relatively near future, it may best to stick with lenses designed for full frames so you can keep using them with a new camera. I personally have a mix of DX (Nikon’s cropped sensor designation) and full-frame lenses as I realize it will be some time before I upgrade to a full-frame camera, and also that Nikon’s full-frame DSLRs allow you to shoot in DX mode, where it will only use the middle of the sensor (a sacrifice in image size, but with a benefit of compatibility). Again, it’s a personal choice based on your plans for your future photography needs.
So, there are two difference or considerations that have to do with the photographer and how you use, and purchase gear. But what about image quality? Are they the same? For the most part, yes they are, but with one big advantage in low noise operation for the full-frame sensor. Because of the larger sensor size, the same number of pixels can be spaced out, and a little larger, a lower pixel density. And though you may think you want more pixel density; this is only true if you have good control over noise. With a lower pixel density due to a larger sensor, a pixel that is excited by light photons, it is less likely to create excitation or noise in the surrounding pixels. So while you maintain the same number of pixels, you effectively get a bigger reduction in noise. This is also true for cameras with really a really high number of MPs, although I get to that in another post. To clarify, this is most important in low light situations, and for things like astrophotography. For most everyday photography, you will be hard pressed to find differences between two pictures from two equal cameras with difference sized sensors. In the real world, that’s when other factors come into play to want a full-frame camera as there are not two equal cameras. Typically full-frame cameras are professional models and have other features, better image processors, easier to use, etc.
Lastly, the full-frame cameras are more expensive. Not only because they tend to be in professional level cameras, but because the sensors are more expensive to make, and therefore the cameras are more expensive to produce and this cost is passed on to the consumer.
There is a lot of information to know and understand about all aspects of photography and cameras, and I hope this was informative. I probably went into more detail than most people want or care to think about, and there is even more I didn’t touch on. The point of this was to highlight the differences and considerations to take into account when comparing cameras with cropped and full-frame sensors, and could be the difference between getting the Nikon D300s and the Nikon D700, but again it is all up to you, as long as you get the tools you want so you can get out and shoot comfortably and focus on the photographs, not the camera.
Subscribe to:
Posts (Atom)